Article: Science Notebook Setup for K–8: One Class, Every Learner
Science Notebook Setup for K–8: One Class, Every Learner
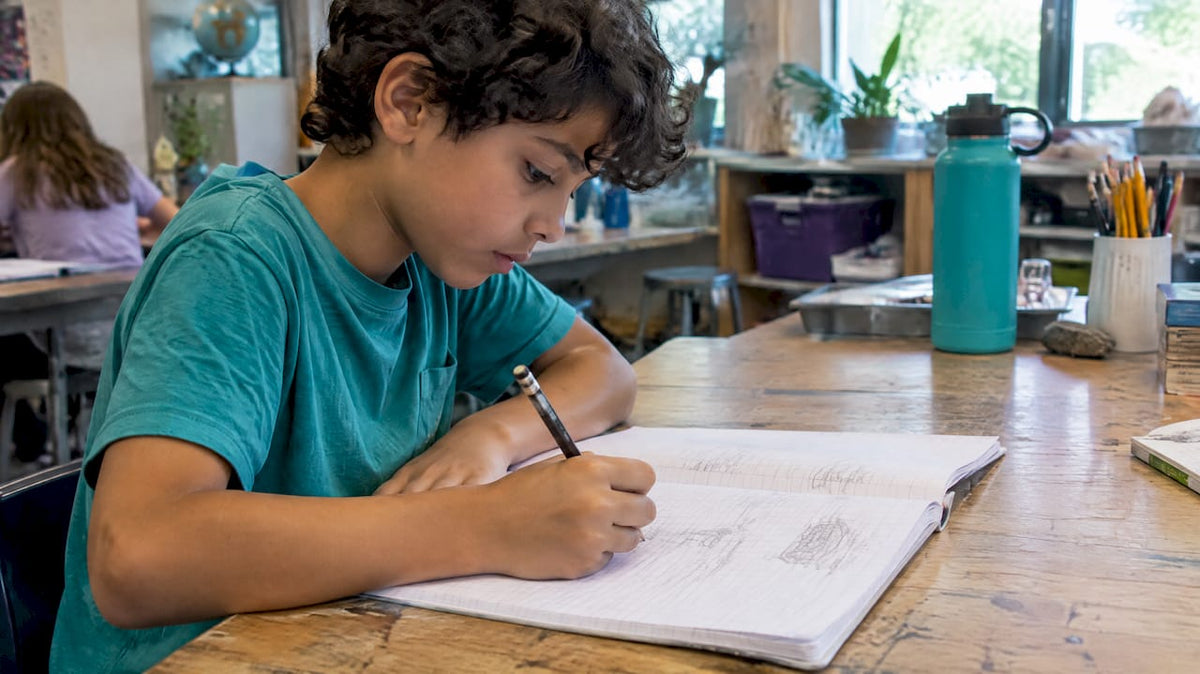
Start with a durable composition notebook, spend one class period on a Notebook Set-Up Day, and use the same entry rhythm every lesson: focus question, observation and data, then a Claim-Evidence-Reasoning reflection. Number the pages, build a living table of contents, and model every step in your own teacher notebook. Offer drawings, photos, or dictation so every child can show their thinking.
TL;DR:
- Choose a sewn or taped composition notebook, about 7.5 by 9.75 inches, with roughly 80 pages; use a sturdy spiral for glued templates.
- Use one class period or split setup across shorter lessons to number pages, reserve contents pages, add templates, and practice an entry.
- Use a consistent header, focus question, observations, and data, then review Claim, Evidence, and Reasoning reflections briefly instead of grading every page.
- Offer drawings, annotated photos, graphic organizers, or dictation so children can show their thinking without relying on full paragraphs.
- A UDL notebook trial conducted over two years reported effect sizes of 0.82 to 1.01 for motivation and science achievement among students with disabilities.
Table of Contents
- What materials make a science notebook last all year?
- What belongs on the cover and first page?
- How do you set up a table of contents and page numbers that actually get used?
- What should happen on Notebook Set-Up Day?
- How do focus questions, data, and CER fit into every entry?
- How do you adapt notebooks for every learner?
- How can notebooks support assessment and portfolios without piling on grading?
- Why should you keep a teacher notebook?
- Which templates can you copy and paste today?
- How do you choose writing and drawing tools for different motor skills and learning needs?
- How can prompts and templates fit different STEAM disciplines?
- How do you encourage creative and narrative entries that build a young innovator’s identity?
- How can role-play make the scientist role feel real?
- How can parents support notebook use at home?
- What safety and hygiene habits belong in the notebook routine?
- Why identity-driven, inclusive notebooking matters
- Optional: pairing kits and lesson plans with notebook routines
- FAQ
- Sources
What materials make a science notebook last all year?
Pick notebooks that survive daily use. A standard composition notebook measures about 7.5" x 9.75" and holds roughly 80 pages (160 sides), and sewn or taped bindings hold up better over time than spiral rings. A sturdy spiral still earns its place when you want pages to lay flat under glued-in templates.
Stock a small supply bin so every entry can be multimodal:
- Pencils and colored pencils for drawings and labels
- Glue sticks or tape for templates and printed photos
- A small ruler for measuring and tidy tables
- A shared tablet or phone for photographing investigations
- A labeled crate or shelf so notebooks are ready the moment an investigation begins
Pro Tip: Buy a few extra notebooks before the year starts. Replacements for lost or soaked ones keep a child’s momentum going.
What belongs on the cover and first page?
A cover is where a child first claims the notebook as theirs. Keep it simple, readable, and a little bit proud. A notebook that looks like a scientist’s notebook invites scientist-style thinking.
- Student name, class or teacher, and school year on the front cover
- A short “I am a scientist” statement in the child’s own words
- Class expectations and how entries will be reviewed on the first page
- A short guide to using the table of contents
- A laminated “my checklist” card pasted inside the front cover
- Stickers, badges, or other role-play touches that add ownership and motivation
Children who struggle in traditional writing settings often light up when the notebook feels like a real tool. The cover is the first low-stakes win.
How do you set up a table of contents and page numbers that actually get used?
Numbering feels tedious, so choose the method that fits your class and your minutes. Teacher stamps are fast but put the work on you. Partner checks build responsibility but need a quick scan afterward. Setting aside a few minutes of class time keeps everything uniform and gives you a chance to circulate.
Then protect the table of contents with a simple workflow:
- Number every page on Set-Up Day, using the method you chose.
- Reserve the opening pages for the table of contents.
- Add each new entry’s title and page number as part of the entry itself.
- Update the table of contents weekly or after every major investigation.
- Run a quick partner audit during warm-up, with teacher spot-checks.
When a table of contents is a habit instead of a chore, children can quickly find last month’s data, and that makes the notebook feel useful.
What should happen on Notebook Set-Up Day?
Dedicating class time to setup helps children build ownership, and using the notebook actively in nearly every lesson keeps it a living scientific tool instead of a storage book. Plan a class period, or split setup across shorter lessons.
- Show real examples, including your own teacher notebook.
- Let children personalize their covers.
- Number the pages.
- Create the table of contents.
- Paste in starter templates, such as an entry header and the checklist card.
- Practice one short entry together, start to finish.
After Set-Up Day, keep the daily routine steady. Each entry opens with a consistent header: date, lesson number, and focus question. Then come the materials list, observations, data, and reflection. Predictable structure frees children to spend their energy on thinking, not on figuring out the format.
Pro Tip: Keep your practice entry tiny. A short entry that a child finishes feels better than an ambitious one left half done.
How do focus questions, data, and CER fit into every entry?
The strongest notebook routines repeat the same rhythm. Effective notebooking starts with a focus question, moves through the investigation and recorded observations, and ends with a meaning-making reflection. The Claim, Evidence, and Reasoning (CER) framework is frequently recommended for structuring that reflection.
Here is how the four steps look on the page:
- Focus question: one sentence the investigation can actually answer
- Investigation: what the child did, saw, heard, or measured
- Data: drawings, labeled diagrams, measurements, tables, or photos
- CER reflection: a claim, the evidence that supports it, and the reasoning that connects them
Children need explicit language for this. Students benefit from direct instruction in argumentation vocabulary and repeated notebook practice before they move from describing to explaining. Offer fill-in-the-blank and checklist supports, such as the Scaffolding Scientific Explanations handouts described by NSTA, then fade them as children gain confidence. Our Claim, Evidence, Reasoning starters for K–8 give you ready sentence stems to paste into notebooks.
Check for understanding with quick formative glances at the CER section instead of grading full pages. Practice improves faster when the feedback is light and frequent.
Key insight from the framework: the Claim, Evidence, and Reasoning framework is frequently recommended for structuring reflections, which is why we build every entry around it.
How do you adapt notebooks for every learner?
Writing should never be the barrier between a child and science. Universal Design for Learning (UDL) makes room for different ways of showing what a child knows. Offer drawings, annotated photos, graphic organizers, dictation, or an adult scribe. Dictation, drawing, and adult scribing lower barriers for younger children and for those with dysgraphia.
- Accept labeled drawings or annotated photos in place of full paragraphs
- Provide sentence starters and multimedia glossaries
- Post success criteria so children know what a strong entry looks like
- Let children dictate a claim aloud before they write or draw it
The evidence is encouraging. UDL-friendly notebook systems have shown effect sizes of 0.82 to 1.01 for motivation and science achievement among students with disabilities in one two-year trial. A two-year effectiveness trial of a digital UDL science notebook also found promising benefits for students with learning disabilities and for students for whom English is not a first language.
What this means in practice: accessible, scaffolded notebooks help the children who most need a reason to believe they are scientists. Our guide on supporting neurodivergent learners with STEAM goes deeper on adapting routines.
How can notebooks support assessment and portfolios without piling on grading?
A notebook should lighten your assessment load, not add to it. Use short rubrics tied to the CER routine so feedback stays quick.
- Build a brief rubric: clear claim, supporting evidence, connecting reasoning
- Hold curation days when children choose entries to revise
- Ask children to write a brief reflection on how an entry has grown
- Use notebooks as the record during teacher-student conferences
Portfolios and curated notebook collections support metacognition, and suggested contents include brainstorming, drafts, data sheets, conclusions, and student reflections so you can evaluate process over final product. Our science reflection exit tickets make good prompts for curation days.
Why should you keep a teacher notebook?
Children copy what they see. When you think aloud in a notebook during a demonstration, you show how a scientist wonders, records, and revises. Keeping and using a teacher notebook during lessons makes expectations visible instead of abstract.
- Write your own focus question and data live on a document camera or chart
- Collect anonymized student exemplars and review them as a class to spotlight one skill at a time
- Move through gradual release: model, guided practice, then independent practice
Pro Tip: Save one slightly messy teacher page on purpose. Seeing you cross out and fix a claim tells children that revising is what scientists do.
Which templates can you copy and paste today?
Low-prep templates save the most time on Set-Up Day. Pre-cut a small stash so pasting takes seconds. Our lesson plans page collects classroom-ready activities that map to notebook prompts.
- Entry headers with date, lesson number, and focus question
- KWHL charts (what we know, want to know, how we’ll find out, what we learned)
- CER and scaffolded-explanation handouts
- “My checklist” cards for the inside cover
- Photo annotation frames for printed images
For kindergarten through second grade, lean on drawing frames and sentence starters. Older elementary students can add data tables and CER stems. Middle school students can handle open reflection prompts with a short revision step.
How do you choose writing and drawing tools for different motor skills and learning needs?
Tools can quietly decide whether a child enjoys notebooking or dreads it. Start by watching how each child grips, presses, and tires. Then offer choices instead of one mandatory tool.
For children who press too hard or tire quickly, offer softer pencils, triangular or thicker barrels, and pencil grips. Children who press too lightly may prefer darker, smoother tools such as gel pens or soft graphite. Colored pencils invite drawing without the commitment of ink, and fine markers help label small details when a child has steady control.

Paper matters too. Wide-ruled pages give more room for large handwriting, and a sticky-note label can stand in for a long sentence beside a drawing. Printed word banks cut spelling anxiety, and a small ruler or stencil can steady lines for children who find freehand diagrams frustrating.
Some children do their best thinking aloud. Pair them with dictation, an adult scribe, or a tablet for voice-to-text, then have them paste the printout into the notebook. Photos work as evidence, too: a child can photograph a setup, print it, and annotate it with arrows and labels.
The goal is that every child can produce a clear record of their thinking. Once you find what works, make it available to everyone without fuss, so no one is singled out for needing a different tool.
How can prompts and templates fit different STEAM disciplines?
Science, technology, engineering, art, and math each ask for slightly different thinking, so a single blank page can feel vague. Short discipline-specific prompts give children a way in without limiting what they notice.
For science, use “I predict… because…” and “What changed? What stayed the same?” For technology, try “What problem does this tool solve?” and “What would you change in version two?” Engineering entries thrive on “My design goal is… My first test showed… My fix was…” Art-linked entries can ask “What colors, shapes, and patterns do you see, and what do they make you think?” Math entries work with “What did we measure? What does the number tell us?”

Keep templates short and repeatable. A half-page frame with a header, a prompt, and a space for a drawing is plenty. Rotate the frame by discipline, and children will start noticing that the same habits of questioning, recording, and explaining travel across every subject.
Our hands-on experiment kits fit this approach well, since each investigation gives children something real to observe and record. You can also vary the template by grade band so that younger children draw and label while older children add a table or a CER revision.
When a child outgrows a frame, let them design their own. Creating a template for a favorite kind of investigation is itself a mark of scientific thinking.
How do you encourage creative and narrative entries that build a young innovator’s identity?
Children who see themselves as innovators tend to take more intellectual risks. Narrative and creative entries give them a place to practice that identity alongside the data.
Try an “Inventor’s log” prompt: “Today I tried to… and the surprising thing was…” Invite short story entries where a child narrates an experiment from the point of view of a ball rolling down a ramp or a drop of water in a plant. Add a “What if?” corner on each page for wild ideas, and celebrate those ideas without grading them.
Sketchnotes, comic strips, and “future me” entries also work well. A child might draw the invention they wish existed and label its parts. Another might write a letter to a scientist they admire. These entries do not replace CER; they sit beside it and make the notebook feel personal.
Praise the thinking, not just the neatness. Comments like “I like how you changed your idea after the test” tell a child that revising is a strength. Share volunteer entries aloud, so children hear peers describe their own discoveries. Over time the notebook becomes a record of who a child is becoming, not just what they learned.
How can role-play make the scientist role feel real?
Role-play turns the notebook from an assignment into a professional tool. A child who feels like a scientist behaves like one, and a few small props go a long way.
Start on Set-Up Day. Hand out “lab badges” or name tags, and let children sign a short “scientist’s promise” on the first page, such as “I will observe carefully, record honestly, and ask questions.” Give each notebook a title like “Field Notebook of Dr. Maya” so the cover carries a role.
During investigations, let children put on lab coats or goggles before they open the notebook. Assign roles in small groups: lead investigator, materials manager, recorder, and reporter. Rotate the jobs so each child writes and speaks.
Certificates add closure. After a unit, award a “lab certificate” that names a skill, such as careful measuring or bold questioning, and have the child paste it inside the notebook. Our lab coats and role-play accessories are built for exactly this kind of identity-building play, and kids who step into the part tend to treat the work with extra care.
Keep it playful and optional. Some children love the costume; others prefer a badge alone. Either way, the message is the same: you are a scientist, and this notebook proves it.
How can parents support notebook use at home?
Families can strengthen a child’s confidence without needing a science background. The most helpful thing a parent can do is show curiosity.
Send home a short note on the first day explaining the entry rhythm: question, observation, then claim, evidence, and reasoning. Suggest that a parent ask, “What did you notice?” and “How do you know?” instead of “Did you get it right?” Those questions mirror the CER routine and help continuity between school and home.
Encourage a regular “show me your notebook” moment. A child can walk a family member through one favorite page. Kitchen science works well for extra entries: observing ice melt, watching a plant lean toward a window, or timing how long a ball rolls. Children can draw or photograph what they see.
For children who struggle with writing, parents can act as scribe, writing exactly what the child says. Remind families that spelling and handwriting are not the goal, and that drawings count as data.
Offer a few low-cost ideas for home, and let families know that kits are optional. What matters is a steady, encouraging habit. Praise effort, ask follow-up questions, and let the child lead. A notebook that gets read and appreciated at home becomes a notebook the child wants to keep filling.
What safety and hygiene habits belong in the notebook routine?
Safe investigations make better science. Build safety into the notebook itself so that it becomes a habit, not a lecture.
Add a “Safety check” line to the entry header. Before starting, the child ticks a quick list: goggles on if needed, hair tied back, workspace clear, hands washed. A short sentence such as “The safety rule I need today is…” keeps them thinking about the specific materials in front of them.
Keep food and investigation materials apart. Anything used in an experiment should not be eaten, and notebooks should stay clear of wet or messy materials. Use a clean “recording zone” at the edge of the table and a separate “materials zone,” and wash hands after handling soil, plants, or anything unfamiliar.
Check labels and age recommendations on every material, and watch for allergies or sensitivities in your group. Small parts, sharp tools, and heat or electricity need direct adult supervision. When photographing, avoid showing faces if your school requires privacy, and wipe down shared tablets between uses.
Clean up is part of the routine too. Children can record, “How I left my space,” as a final line. Treat safety as part of scientific thinking: a careful scientist plans, protects themselves and others, and leaves a tidy space. When expectations are clear and consistent, children relax and focus on the discovery.
Why identity-driven, inclusive notebooking matters
Behind every routine in this article is one belief: children who see themselves as scientists keep acting like scientists. A notebook is more than a place to store answers. It is where a child practices being curious, being wrong, and trying again.
That is why we favor scaffolds, choices, and role play over perfect handwriting. A child who draws a brilliant observation deserves the same pride as one who writes a full paragraph. Different minds notice different things, and the best classrooms make room for all of them.
Adapt anything here to fit your class, and let students own the choices wherever you can. If you try these routines, we would love to hear what worked, what you changed, and what your students invented along the way.
— Tita
Optional: pairing kits and lesson plans with notebook routines

When you want the investigation part of each entry ready to go, we can save you prep time. Our hands-on kits give children real materials to observe and record, and they work well on Notebook Set-Up Day. Kits are never required; a notebook routine works with everyday materials too.
- Browse our lesson plans for prompts and templates that match notebook entries
- Explore our experiment kits for ready-made investigations
Start with one kit and one entry, and see how your students respond at Shop.
FAQ
What is the best notebook for a kids’ science journal?
A sewn or taped composition notebook is usually the best everyday choice because it holds up to daily handling. A sturdy spiral works when pages need to lay flat for glued-in templates.
How long does it take to set up a science notebook?
Plan one class period, or split setup across two shorter lessons. That time covers the cover, page numbers, table of contents, starter templates, and a short practice entry.
How can children who struggle with writing use a science notebook?
Let them show their thinking through drawings, annotated photos, graphic organizers, or dictation to an adult. Pair these options with clear success criteria so every child knows what a strong entry looks like.
What should every notebook entry include?
Each entry should start with a header and a focus question, then record the investigation and data, and end with a Claim, Evidence, Reasoning reflection. Repeating the same pattern makes entries faster to write and easier to review.
Sources
- How to setup a Science Notebook – College of Natural Sciences Education and Outreach Center | CSU
- K20 LEARN | STEM Challenge: Investigate, Calculate, Build, Test
- Teaching
- Setting Up Your Science Notebooks | Science Notebook Corner

Leave a comment
This site is protected by hCaptcha and the hCaptcha Privacy Policy and Terms of Service apply.