Barfing Pumpkin Crafts: Fun Halloween STEM for Kids
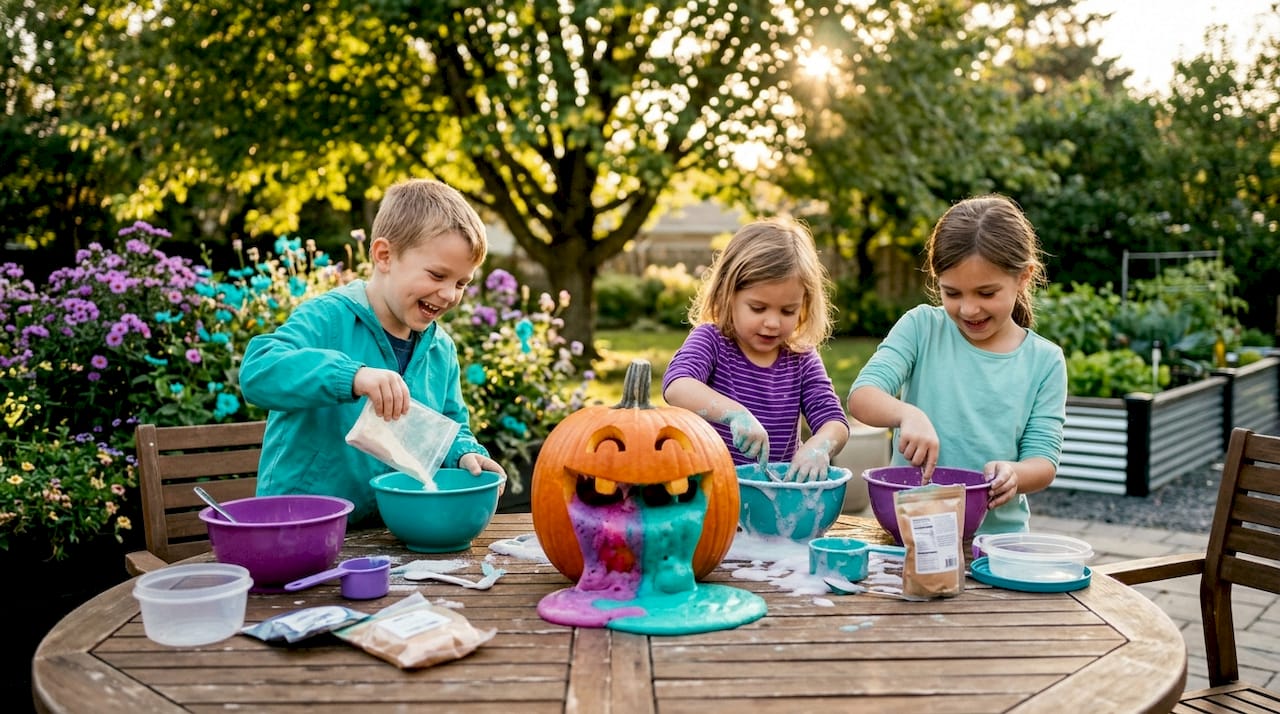
A barfing pumpkin is a creative Halloween craft that uses either a fizzy chemical reaction or a visually playful edible dip to mimic a pumpkin “vomiting.” The craft goes by several names, including pumpkin vomiting decoration and puking pumpkin, but the underlying concept is the same: carve a pumpkin with an exaggerated open mouth, then fill it with a substance that spills out dramatically. Kids ages 5 to 13 find this activity irresistible because it combines gross-out humor with real science. The fizzy version teaches acid-base chemistry through the classic baking soda and vinegar reaction, while the edible version doubles as a party snack that looks delightfully disgusting.
What is a barfing pumpkin and why kids love it
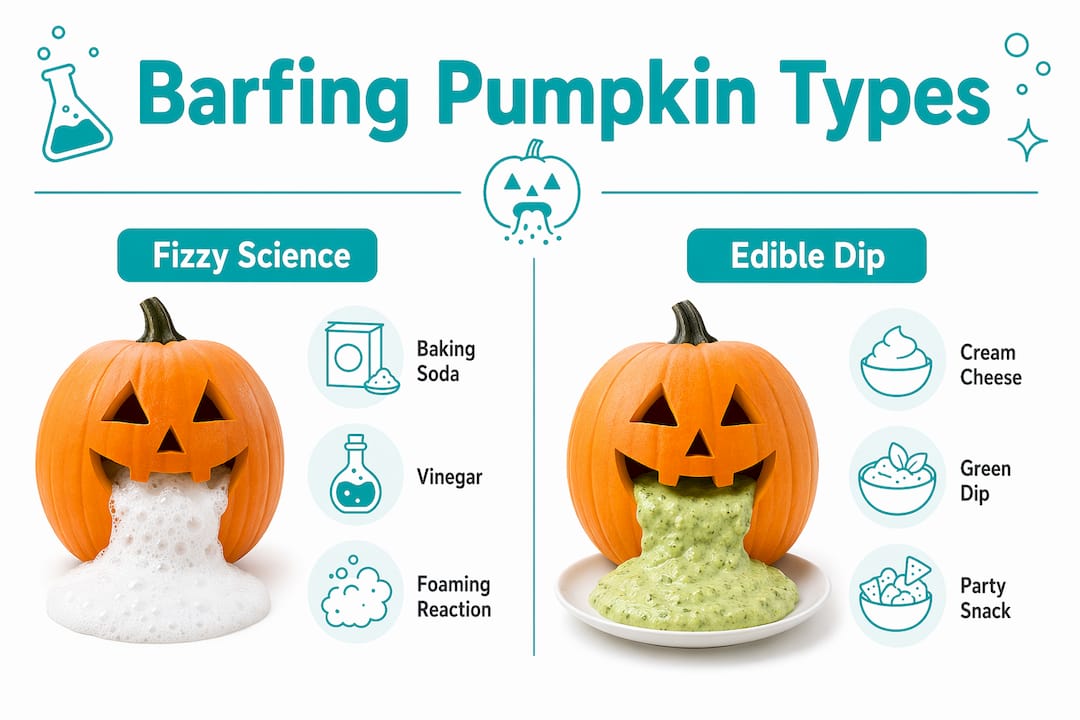
A barfing pumpkin is defined as a carved or decorated pumpkin designed to appear as though it is vomiting, achieved through either a foaming chemical reaction or a green dessert dip arranged to flow from the mouth. The standard industry terms for the two versions are “fizzy eruption pumpkin” for the science experiment and “puking pumpkin dip” for the edible party version. Both approaches share the same visual goal: maximum gross-out appeal with maximum kid engagement.
The fizzy chemical reaction excites children because it connects a Halloween decoration to real chemistry concepts, inspiring questions rather than formula memorization. Teachers who have used this activity in classrooms report that children ask more follow-up science questions after watching the foam erupt than during traditional lessons. That curiosity is exactly what makes funny pumpkin crafts like this one so powerful as a learning tool.
The edible version works equally well for Halloween parties and classroom celebrations where food is welcome. A green dessert dip made from cream cheese, marshmallow fluff, and whipped topping looks genuinely gross but tastes sweet and crowd-pleasing. Both versions are accessible to parents, educators, and caregivers with limited budgets and basic kitchen or classroom supplies.
What materials do you need for both versions
Gathering the right supplies before you start saves time and prevents mid-project scrambling. The two versions share the pumpkin itself but diverge completely on everything else.
Fizzy science version supplies
| Item | Purpose |
|---|---|
| Medium pumpkin (carved) | The “body” of the experiment with a wide, low mouth |
| Baking soda (3/4 cup) | The base that reacts with vinegar to produce foam |
| White vinegar (1 cup) | The acid that triggers the carbon dioxide reaction |
| Dish soap (a few drops) | Thickens the foam for a more dramatic vomit effect |
| Food coloring (green or orange) | Adds visual impact to the erupting foam |
| Shallow tray or baking sheet | Catches overflow and simplifies cleanup |
| Safety glasses and aprons | Protects eyes and clothing during the reaction |
Pro Tip: Pick up a pair of lab safety glasses designed for kids before you start. Adult glasses slip off small faces and reduce the protective effect.
Edible puking pumpkin dip supplies
- 8 oz cream cheese, softened
- 7 oz marshmallow fluff
- 4 oz whipped topping (such as Cool Whip)
- Green food coloring (several drops to reach a vivid green)
- 15.25 oz can of tropical mixed fruit, drained
- 1 cup mini marshmallows
- Dippers: apple slices, pretzels, graham crackers
You will also need a large serving platter, a mixing bowl, a hand mixer or sturdy spoon, and a carved pumpkin with a wide, downward-curving mouth. Both versions benefit from having paper towels and a trash bag within reach before you begin.
How to make a fizzy Halloween barfing pumpkin
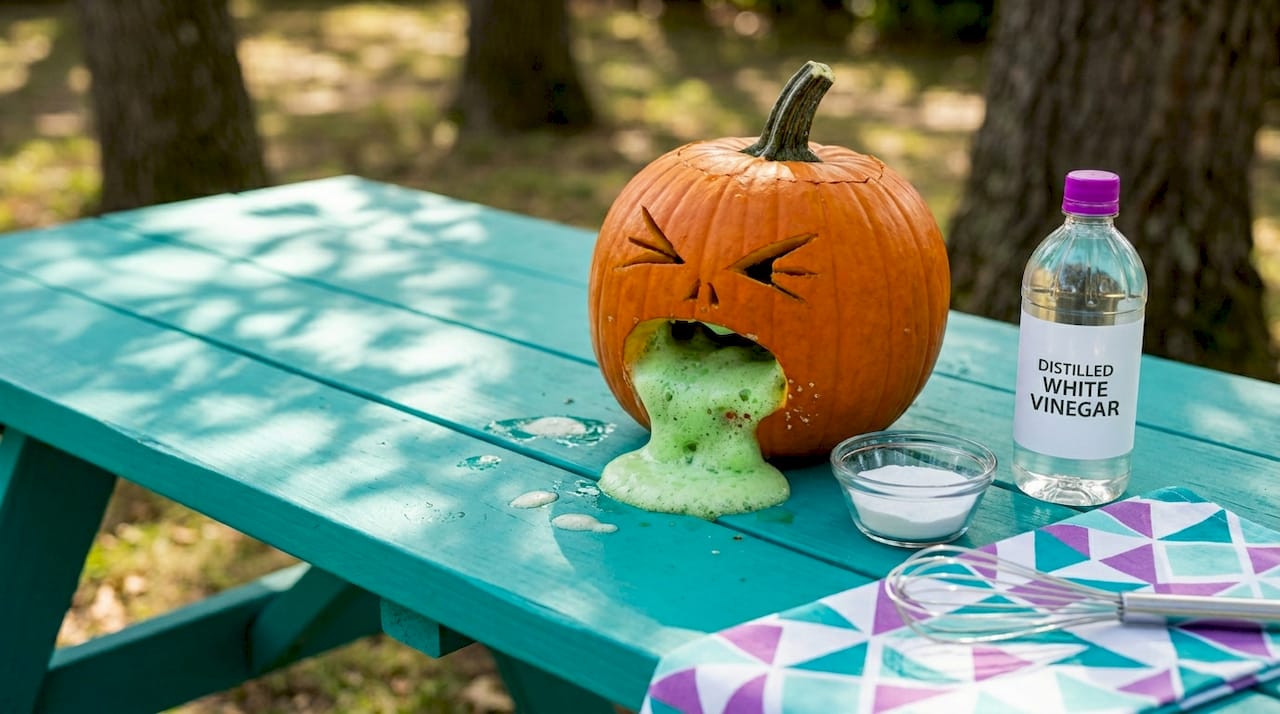
The fizzy version is the classic Halloween barfing pumpkin activity, and the baking soda and vinegar reaction releases carbon dioxide gas as bubbles and foam that push out of the pumpkin’s mouth in a satisfying eruption. Getting the most dramatic effect requires attention to carving, measuring, and sequencing.
Step-by-step instructions
- Carve the pumpkin mouth wide and low. A large mouth near the base produces more vomit overflow than a small or high-placed mouth. Aim for an opening that spans at least one-third of the pumpkin’s front face.
- Scoop out the interior completely. Remove all seeds and pulp so the baking soda sits directly on the pumpkin floor without obstruction.
- Set the pumpkin on a tray. Place it on a shallow tray to catch the overflow. Lay newspaper or a plastic tablecloth under the tray for extra protection.
- Add baking soda and color. Pour approximately 3/4 cup of baking soda inside the pumpkin. Add several drops of green food coloring and a small squeeze of dish soap directly onto the baking soda.
- Pour the vinegar slowly. Use about 1 cup of white vinegar and pour it steadily into the pumpkin’s interior. The foam will begin rising within seconds and push out through the mouth.
- Observe and discuss. Ask kids what they notice about the bubbles, the temperature of the pumpkin exterior, and the speed of the reaction. These observations connect directly to acid-base chemistry concepts without requiring any formal instruction.
Pro Tip: To repeat the reaction, rinse the pumpkin interior with water between runs and add fresh baking soda and vinegar. Most pumpkins can handle three to five rounds before the interior becomes too saturated.
One classroom setup documented using about 5 spoonfuls of baking soda with 1/2 cup of vinegar for a smaller pumpkin, scaling up to 3/4 cup baking soda with 1 cup of vinegar for a larger one. The scale matters because a larger pumpkin cavity absorbs more of the reaction before foam reaches the mouth. Always match your measurements to your pumpkin size for the best visual payoff.
Safety rules during the fizzy reaction are non-negotiable: no eating the chemicals, no pointing the pumpkin mouth toward faces, and no touching the foam without washing hands afterward. Goggles stay on until the reaction fully stops.
How to make an edible puking pumpkin dip for parties
The edible pumpkin puke craft is the party-friendly cousin of the science version, and it delivers the same visual impact with zero chemical risk. The recipe combines cream cheese, marshmallow fluff, and whipped topping with green food coloring, drained tropical fruit, and mini marshmallows for a dip that looks genuinely gross and tastes genuinely good.
Step-by-step instructions
- Soften the cream cheese. Leave 8 oz of cream cheese at room temperature for 30 minutes so it blends smoothly without lumps.
- Mix the base. Beat the cream cheese and 7 oz of marshmallow fluff together until smooth. Fold in 4 oz of whipped topping.
- Add color and mix-ins. Stir in several drops of green food coloring until the dip reaches a vivid, slightly unsettling green. Fold in the drained mixed fruit and 1 cup of mini marshmallows.
- Chill the dip. Refrigerate for at least 1 hour to set the texture and meld the flavors. Skipping this step produces a runny dip that does not hold its shape on the platter.
- Carve and position the pumpkin. Use a medium pumpkin with a wide, downward-curving mouth. Place it at the top of a large serving platter.
- Arrange the dip as vomit. Spoon the dip so it flows out of the pumpkin’s mouth and spreads down the platter in a convincing vomit stream. Surround it with apple slices, pretzels, and graham crackers for dipping.
Pro Tip: For classroom events, prepare the dip the night before and store it covered in the refrigerator. Morning setup takes less than five minutes and the texture will be perfect.
Allergy awareness matters here. The dip contains dairy from the cream cheese and whipped topping. Check with parents or caregivers before serving at school events. Pretzels contain gluten, so offer apple slices and fruit as gluten-free dippers for children with dietary restrictions.
Common mistakes that ruin the effect (and how to fix them)
Even simple projects go sideways without the right preparation. These are the most frequent problems and their direct solutions.
- Mouth carved too small or too high. A narrow or elevated mouth traps the foam inside the pumpkin instead of letting it flow out. Recarve the opening wider and lower, or choose a different pumpkin.
- Skipping the tray. Without a tray to catch overflow, the foam spreads across the table and floor in seconds. Always set up containment before adding any reactants.
- Wrong measurements. Too little baking soda produces a weak fizz. Too much vinegar floods the pumpkin before foam builds. Start with the ratios in the instructions above and adjust based on pumpkin size.
- Not chilling the edible dip. A warm dip slides off the platter and loses its visual impact. The one-hour chill is not optional for presentation purposes.
- Letting kids eat the fizzy version. The baking soda and vinegar mixture is not toxic in small amounts, but it is not food. Keep the two versions clearly separated and label them at any group event.
- Repeating without rinsing. Residual vinegar left in the pumpkin neutralizes the fresh baking soda before the reaction can build. Always rinse and dry the interior between runs.
Pro Tip: For safe hands-on science with younger children ages 5 to 7, assign one adult to handle the vinegar pouring while kids observe and record what they see. This keeps the excitement high and the risk low.
Key takeaways
A barfing pumpkin works best when mouth placement is low and wide, reactant measurements match pumpkin size, and mess containment is set up before the experiment begins.
| Point | Details |
|---|---|
| Mouth placement is critical | Carve the mouth wide and near the base to maximize foam overflow. |
| Measure reactants carefully | Use 3/4 cup baking soda and 1 cup vinegar for a medium pumpkin for best results. |
| Chill the edible dip | Refrigerate the puking pumpkin dip for at least 1 hour before serving. |
| Reset between runs | Rinse the pumpkin interior with water before adding fresh reactants for repeat eruptions. |
| Safety first | Use goggles and a tray, and never let children eat the fizzy chemical version. |
Why this activity unlocks something special in young learners
I have watched a lot of science activities land flat with kids, and I have watched a handful of them light up an entire room. The barfing pumpkin is firmly in the second category, and I think the reason is worth understanding.
Most school science activities ask children to observe something and write down what happened. The fizzy pumpkin asks children to cause something to happen, and the result is immediate, loud, and genuinely funny. That shift from observer to creator is where real confidence begins. When a seven-year-old watches foam pour out of a pumpkin she just filled herself, she does not think “I followed instructions.” She thinks “I made that happen.” That distinction matters more than any worksheet.
The edible version carries a different kind of magic. Food that looks wrong but tastes right is a form of creative problem-solving that kids understand intuitively. Designing a platter that looks gross enough to be funny but appealing enough to eat requires visual thinking, planning, and a willingness to experiment. Those are not just cooking skills. They are the same skills young innovators use every day.
My honest advice: do both versions on the same day if you can. Run the fizzy experiment first so kids can observe the chemistry, then transition to the edible version as a reward. The contrast between “science pumpkin” and “snack pumpkin” reinforces that the same theme can be explored through completely different lenses. That kind of flexible thinking is exactly what we want to build in children ages 5 to 13.
One more thing: do not worry about perfection. A lopsided foam eruption or a slightly runny dip is not a failure. It is data. Ask kids why they think it happened and what they would change next time. That question is the whole point.
— Tita
Extend the fun with Teamgeniussquad STEM kits
If the barfing pumpkin sparked your child’s curiosity about chemistry and hands-on experiments, Teamgeniussquad has discovery kits designed to keep that momentum going all year long. Each kit is built around the E³ Method (Engage, Encourage, Empower) so children do not just complete an experiment. They step into the role of a scientist, build confidence through discovery, and walk away believing they can solve real problems.

The experiment kits collection includes options for every curiosity level, from chemistry and energy to creative engineering. For families looking to explore more this season, the Teamgeniussquad STEM kits are available now and make the perfect follow-up to any Halloween science activity. Screen-free, hands-on, and built for children who learn by doing.
FAQ
What is a barfing pumpkin?
A barfing pumpkin is a carved Halloween pumpkin designed to appear as though it is vomiting, using either a foaming baking soda and vinegar reaction or a green edible dip arranged to flow from the mouth.
What causes the fizzy vomit effect in a science pumpkin?
The foam is produced when baking soda (a base) reacts with vinegar (an acid) to release carbon dioxide gas. Adding dish soap thickens the bubbles into a foam that pushes out through the carved mouth.
How do you make the edible puking pumpkin dip?
Blend 8 oz softened cream cheese with 7 oz marshmallow fluff and 4 oz whipped topping, then stir in green food coloring, drained tropical mixed fruit, and 1 cup mini marshmallows. Chill for at least 1 hour before serving.
Can you repeat the fizzy pumpkin reaction more than once?
Yes. Rinse the pumpkin interior with water after each eruption, then add fresh baking soda and vinegar to reset the reaction. Most pumpkins support three to five repeat runs.
Is the barfing pumpkin activity safe for young children?
The fizzy version is safe with adult supervision, safety glasses, and a tray to contain overflow. Children should never eat the chemical version. The edible dip version is safe for most children, though dairy and gluten allergies should be checked before serving at group events.
Leave a comment
This site is protected by hCaptcha and the hCaptcha Privacy Policy and Terms of Service apply.