Shaving Cream Paint: A STEAM Marbling Guide for Kids
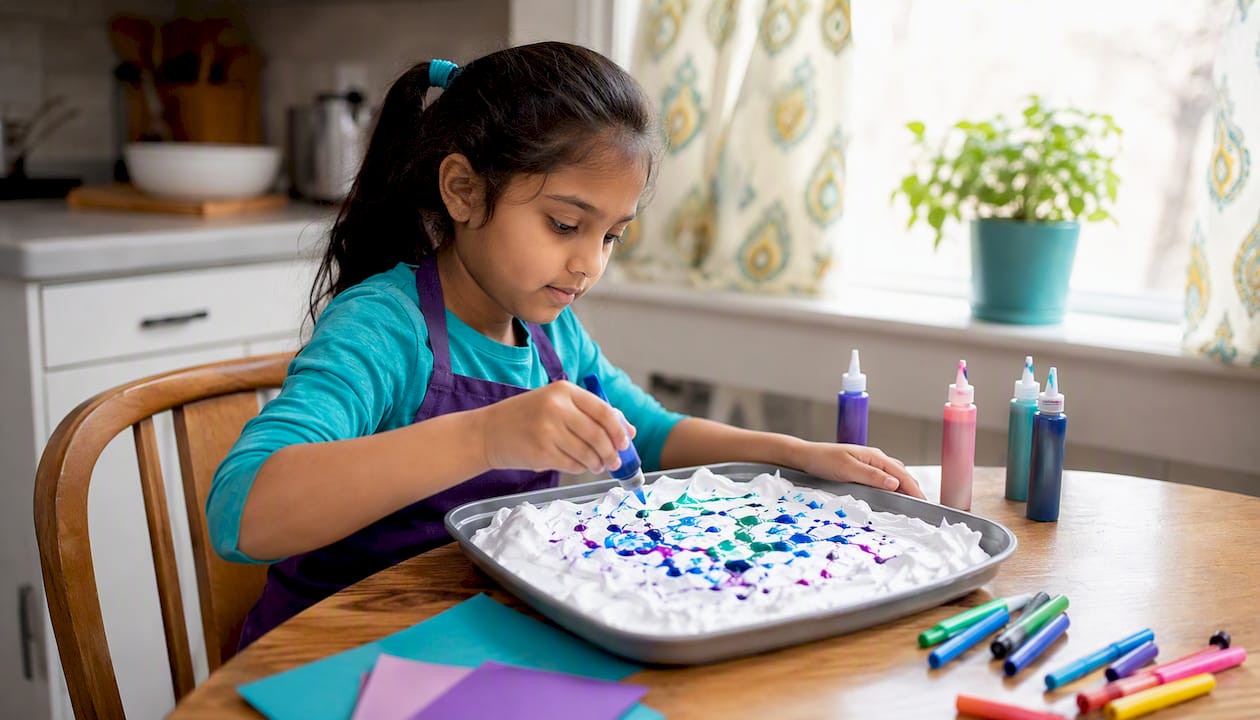
Shaving cream paint is a kid-safe marbling technique that combines foaming shaving cream, liquid color, and heavyweight paper to create stunning marbled prints in minutes. The short recipe: spread foaming shaving cream (never gel) into a shallow tray to about 0.5 inches deep, drop several colors across the surface using a few drops per color, swirl with a skewer in loose S-curves for 4–6 passes, press cardstock face-down briefly, then scrape the cream away to reveal the print. That first pull is the most vibrant one you’ll get. The activity is designed for ages 5–13 with adult setup and supervision; use washable colors and aprons to keep cleanup manageable. Teamgeniussquad’s hands-on STEAM kits are built around exactly this kind of purposeful, sensory discovery.
Table of Contents
- What materials do you need for shaving cream paint?
- How do you do the shaving cream marbling technique step by step?
- Safety rules and cleanup for child-friendly sessions
- What do kids learn from shaving cream art?
- Key Takeaways
- Why shaving cream marbling fits the E³ method perfectly
- Teamgeniussquad kits make this activity classroom-ready from day one
What materials do you need for shaving cream paint?
Getting the materials right makes the difference between a crisp marbled print and a soggy mess. Here’s exactly what to gather before you start.
Essential supplies:
- Foaming shaving cream (aerated foam only, not gel — the foam’s airy structure suspends pigment on the surface and makes marbling possible)
- Liquid watercolor, washable tempera, or diluted food coloring (washable options reduce staining risk; food coloring can temporarily stain hands and fabric)
- Heavyweight cardstock or watercolor paper — smooth surfaces produce the clearest prints; avoid heavily textured paper
- Shallow tray or pan (a pie plate works for small prints; a 9×13 baking pan fits standard cardstock)
- Droppers or squeeze bottles for controlled color placement
- Chopstick or skewer for swirling
- Squeegee or stiff cardboard for scraping
- Aprons or old shirts, table covers, damp cloths, and optional nitrile gloves for sensitive kids
Substitutes and classroom-friendly swaps:
| Supply | Standard Option | Budget/Classroom Swap |
|---|---|---|
| Color medium | Liquid watercolor | Diluted food coloring (stains more) |
| Paper | heavyweight smooth cardstock | Smooth watercolor paper |
| Tray | Shallow baking pan | Disposable aluminum tray |
| Scraper | Squeegee | Stiff cardboard strip |
| Dropper | Pipette dropper | Squeeze bottle |
| Engagement add-on | Lab coat | Old button-down shirt |
Pro Tip: Squeeze bottles give younger children (ages 5–7) far more control over color placement than open droppers, which means less accidental over-saturating and more intentional pattern-making.
One critical measurement: aim for a shaving-cream layer about 0.5 inches deep. Too shallow and the color has nowhere to sit; too deep and the cream slides off the paper during scraping.
How do you do the shaving cream marbling technique step by step?
This method runs cleanly in a single session. Setup takes roughly 5 minutes, the activity itself about 10 minutes per round, and cleanup under 5 minutes when you’re organized.
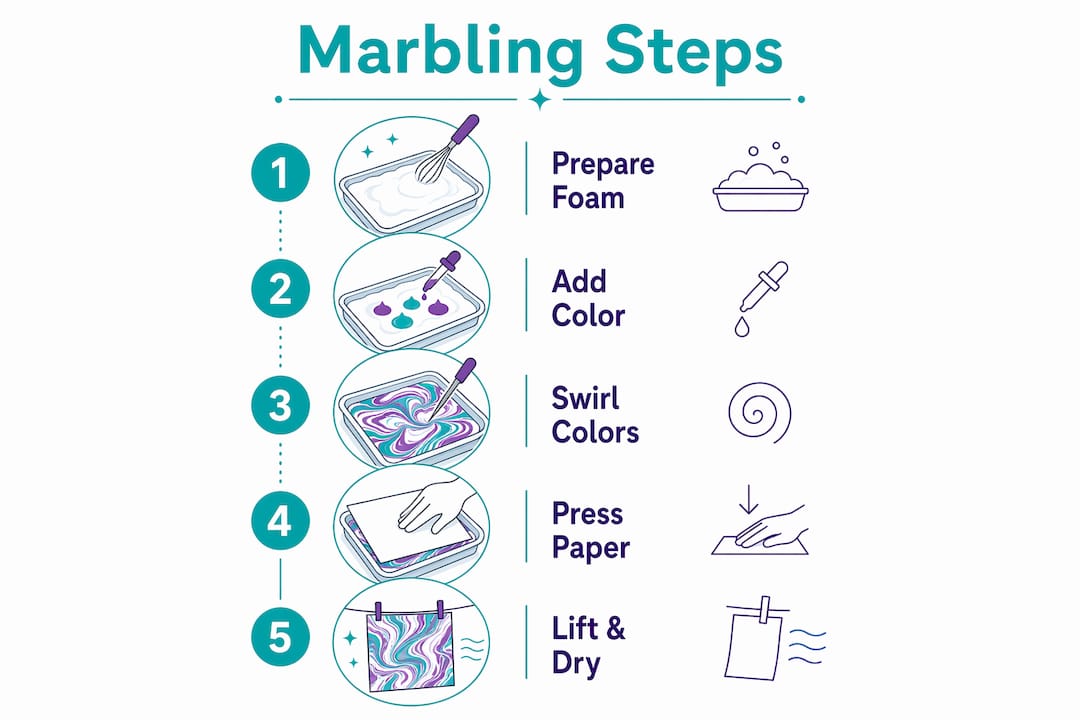
- Cover the work surface with a plastic tablecloth or newspaper. Set damp cloths and cleanup supplies within reach before foam touches the tray.
- Assign roles for groups: one child handles the dropper, one swirls, one presses, one scrapes. Rotating roles keeps everyone engaged and builds turn-taking skills.
- Spray foaming shaving cream into the tray and spread it evenly with a spatula or the back of a spoon until the layer is approximately 0.5 inches deep across the surface.
- Add color drops — 3–5 drops per color, scattered across the foam rather than concentrated in one spot. Use 2–4 contrasting colors for the strongest visual results.
- Swirl with a skewer using loose, flowing S-curves. Stop after 4–6 passes; overmixing produces a muddy, grey-brown result rather than distinct marble streaks.
- Press cardstock face-down gently and evenly for about 3 seconds. Smooth lightly with your palm to ensure full contact, then lift straight up.
- Scrape the cream away in one smooth stroke using a squeegee or cardboard edge. The print is essentially dry to the touch right after scraping — no waiting required.
- Lay prints flat to finish drying. Even thick cardstock may curl slightly at first but flattens as it dries.
Timing note for acrylics: If older students (ages 10–13) want to experiment with acrylic paints, press and scrape within 60–90 seconds — acrylics set faster on the foam surface than watercolors or tempera do.
The first print pulled from the tray is the most vibrant; subsequent pulls lighten as pigment spreads and absorbs into the foam. Plan assessment prints or display pieces as the first pull of each fresh tray.
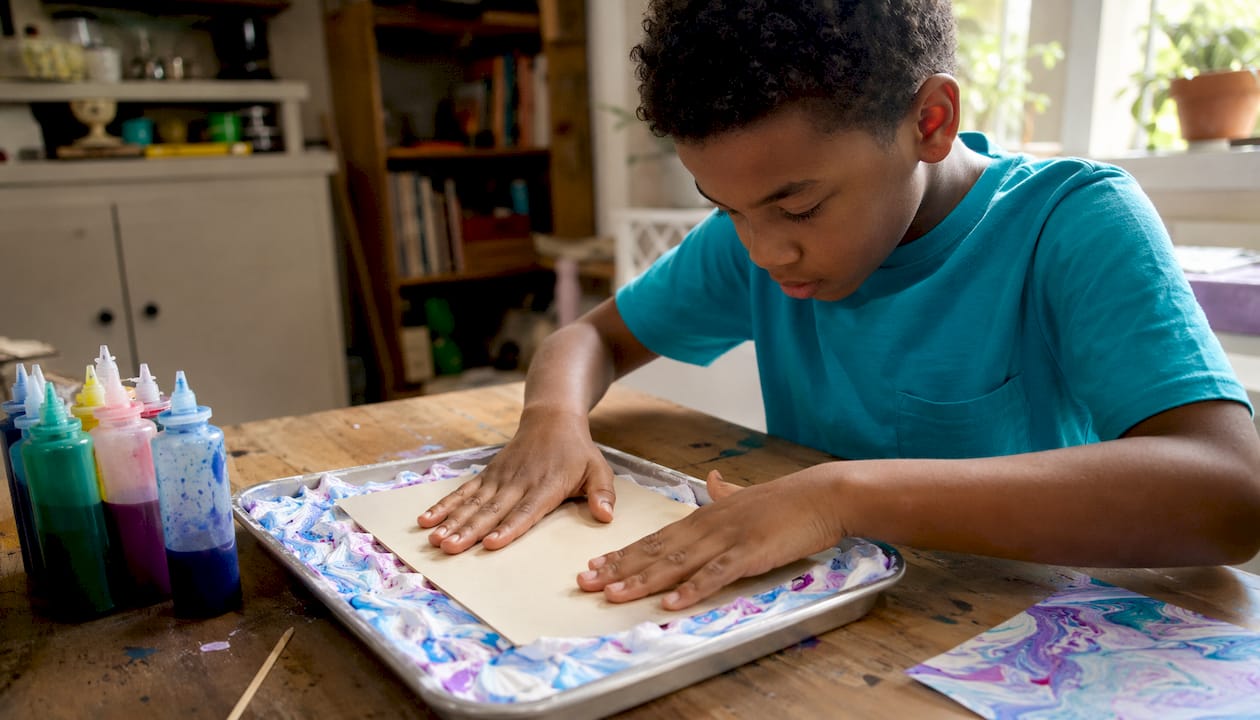
Pro Tip: Rather than remaking the entire foam layer for each student, add fresh drops of color to the existing tray between pulls. The foam holds its structure long enough for several rounds before it needs refreshing.
Safety rules and cleanup for child-friendly sessions
Foaming shaving cream is for external use only. Supervise closely to prevent tasting, and rinse eyes immediately with water if foam gets in them.
Before you start:
- Dress children in aprons or old shirts; cover tables completely
- Set out nitrile gloves for kids with sensitive skin
- Have a handwashing station or wet wipes within arm’s reach
Stain awareness: Food coloring can temporarily stain skin for about 1–2 washes. Washable liquid watercolors or diluted washable tempera reduce that risk significantly and are the recommended choice for classroom settings.
Cleanup checklist:
- Scrape used cream into a trash bag or disposable container first — don’t pour large volumes of colored foam directly down the drain
- Rinse trays with a hose or sink immediately after scraping
- Wipe tables with damp cloths before the foam dries
- Have children wash hands thoroughly as the final step of the activity
One genuinely fun extension: shaving-cream marbling works as supervised bathtub play because the foam rinses away easily. Just supervise carefully, since some colorants may temporarily stain the tub or skin.
What do kids learn from shaving cream art?
The learning packed into this single activity spans multiple STEAM domains, which is exactly why it belongs in any hands-on curriculum.
Core learning objectives:
- Sensory exploration: Tactile engagement with foam texture builds sensory tolerance and fine-motor control
- Color theory: Observing how colors blend, contrast, and shift during swirling introduces mixing and complementary color concepts
- Cause and effect: Each swirl decision produces a visible, immediate result — a direct lesson in how variables change outcomes
- Creative expression: No two prints are identical, which builds confidence through low-stakes experimentation
Differentiation by age:
- Ages 5–7: Focus on sensation, color naming, and the joy of the unexpected pattern. Prediction prompts (“What color do you think will appear?”) work beautifully here.
- Ages 8–13: Introduce variable testing. Change tray depth, number of drops, or swirl passes and document findings in short lab notes or picture journals.
Extensions and variations:
- Press small canvas panels with acrylics for a more permanent display piece (work quickly within 60–90 seconds)
- Create layered prints and collage them into greeting cards or book covers
- Run a variables experiment: test different tray depths, color counts, and swirl patterns, then compare results
- Add writing prompts (“Describe your pattern like a story”) for literacy integration
- Connect to math through symmetry observations and ratios of color drops
Shaving-cream marbling is one of those rare activities where there is no wrong answer. Every child walks away with something beautiful and something learned — and that combination is exactly what builds the confidence to try the next experiment.
Classroom management tip: set up three stations (color-adding, swirling/pressing, drying/labeling) so children rotate and every student gets a hands-on role. This mirrors the kind of structured inquiry that supports STEAM learning outcomes for elementary-age learners.
Key Takeaways
Shaving cream marbling works reliably when you use foaming shaving cream at about 0.5 inches deep, limit swirling to 4–6 S-curve passes, and press heavyweight smooth cardstock or watercolor paper for about 3 seconds.
| Point | Details |
|---|---|
| Foam depth matters most | Spread foaming shaving cream to ~0.5 inches deep; too shallow or too deep ruins the print. |
| Swirl limit is 4–6 passes | Stop while streaks are distinct; overmixing produces muddy brown results. |
| First pull is most vibrant | Plan assessment or display prints as the first pull from each fresh tray. |
| Use washable colors | Washable tempera or liquid watercolor reduces staining on skin and fabric compared to food coloring. |
| Teamgeniussquad kits extend the activity | Teamgeniussquad’s STEAM kits include printable lab notes, role-play prompts, and differentiation guides that turn this craft into a full STEAM session. |
Why shaving cream marbling fits the E³ method perfectly
There’s something quietly powerful about watching a child press paper into a tray of swirled foam and lift it to reveal a pattern that is entirely their own. That moment of surprise and ownership is not accidental — it’s the Engage step of Teamgeniussquad’s E³ Method (Engage, Encourage, Empower) playing out in real time.
The activity encourages because it removes the fear of failure. No child can “do it wrong” when every pull produces something unique and beautiful. And it empowers because older students who test variables, record observations, and compare results are doing real scientific inquiry — not just making art.
What often gets overlooked in craft-based STEAM activities is the literacy layer. Adding a short prediction journal entry before the swirl and a reflection sentence after the scrape transforms a five-minute craft into a full inquiry cycle. That’s the integration Teamgeniussquad builds into every kit: hands-on discovery paired with reading, writing, and reflection so children build identity as scientists and creators, not just participants.
Teamgeniussquad kits make this activity classroom-ready from day one
Running shaving-cream marbling with a group of 20 kids is a different challenge than doing it at your kitchen table with one child. Portioning supplies, managing multiple age levels, and keeping the science intentional rather than purely messy — that’s where preparation makes all the difference.

Teamgeniussquad’s hands-on STEAM kits are designed for exactly that reality. Each kit includes pre-curated materials guidance, printable lab notes and lesson plans that walk children through prediction, observation, and reflection, plus role-play prompts that help kids step into the identity of a young scientist rather than just a craft participant. The differentiation options built into each kit mean a 6-year-old and an 11-year-old can work from the same activity with age-appropriate depth. For parents and educators who want to pair this marbling activity with broader STEAM exploration, Teamgeniussquad’s STEAM books and puzzles extend the learning well beyond the tray. Visit the lesson plans page to see what’s available and find the right fit for your classroom or home setup.

Leave a comment
This site is protected by hCaptcha and the hCaptcha Privacy Policy and Terms of Service apply.