
5–15 Minute Sensory STEM Activities for Parents and Teachers
Sensory STEM activities are hands-on experiments that use sight, sound, touch, smell, or taste to teach a single science idea. Pick one low-prep activity and try it in under 15 minutes. Choose one to three activities to start, most take 5 to 15 minutes to set up with items already in your kitchen or craft bin, and every one below is safe with normal adult supervision.
TL;DR:
- Sensory STEM activities largely use household items and take between five to twenty minutes to set up, making them accessible for quick, screen-free experiments.
- Activities like magnetic bottles, oil and milk bins, and slime exploration help teach concepts such as magnetism, density, polymers, and viscosity through direct sensory engagement.
- Most experiments can be extended into multi-day investigations by changing variables or combining senses, encouraging deeper understanding and ongoing curiosity.
- Group setups with rotation stations enhance engagement and manage energy, especially in classroom settings, while prep hacks simplify and speed up assembly.
- Kits from Team Genius Squad offer pre-measured materials, detailed instructions, and role-play elements for more structured, repeatable sensory science experiences.
Table of Contents
- What Are Sensory STEM Activities, Exactly?
- 12 Sensory STEM Activities to Try This Week
- How to Run Each Activity Step by Step
- Prep Hacks and Group Management for Busy Classrooms
- What Kids Actually Learn From These Activities
- Turning One Activity Into a Multi-Day Investigation
- How Team Genius Squad’s Kits Build on Sensory Science
- Why the Loudest Kid Isn’t Always the Most Engaged One
- Ready to Skip the Prep? Try a Team Genius Squad Kit
- Sources
- FAQ
What Are Sensory STEM Activities, Exactly?
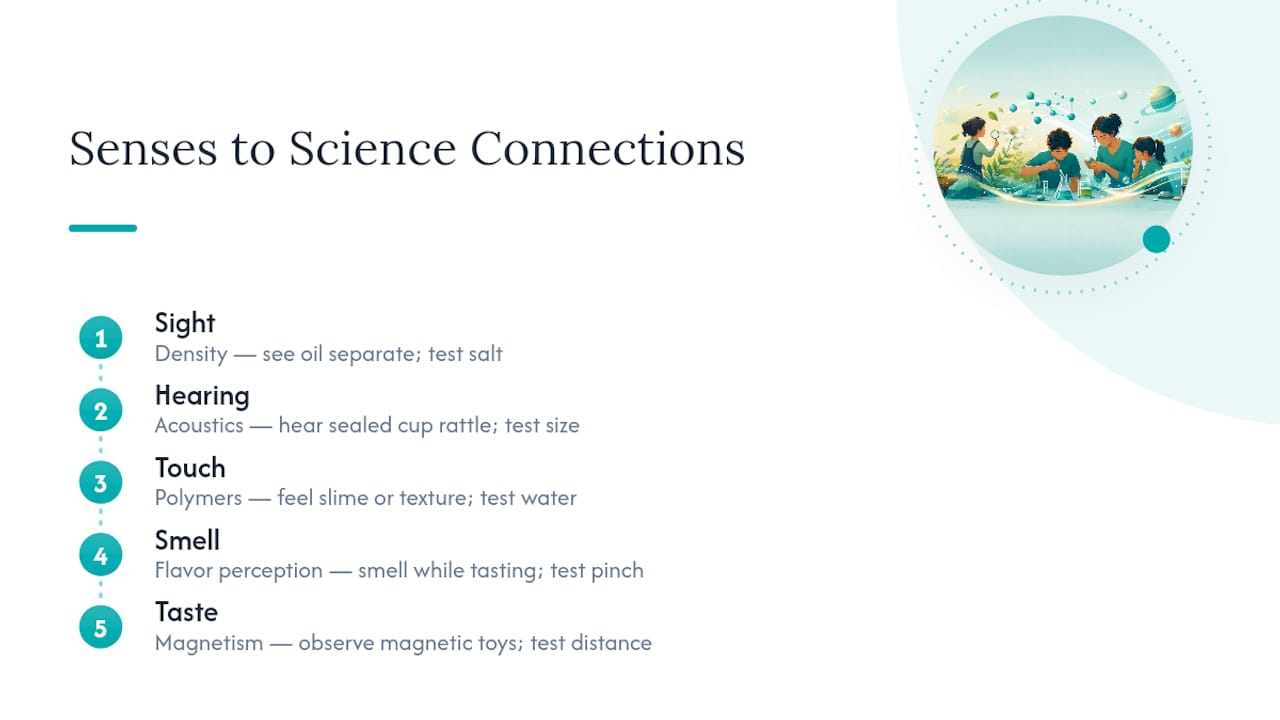
Sensory STEM activities are experiments built around one of the five senses instead of a worksheet or a screen. A child watches oil separate from milk, listens to a sealed cup rattle, or tastes a jelly bean while pinching their nose shut. Each moment is a tiny experiment in disguise, and that’s the whole point.
The “sensory” part isn’t decoration. It’s the delivery method for real science content: magnetism, density, acoustics, flavor perception, polymers. Sensory science activities lean on a child’s existing curiosity about how the world feels, sounds, and tastes, then attach that curiosity to a testable question. The Exploratorium’s approach to hands-on “Snacks” activities builds on exactly this idea: kids learn to ask questions, gather observations, and test ideas rather than memorize facts.
This also makes these projects genuinely unplugged STEM activities. There’s no app, no video, no screen mediating the discovery. A child’s own eyes, ears, fingers, nose, and tongue are the instruments. For families and classrooms trying to build in more screen-free learning activities, that’s a real advantage. It’s also why these experiments tend to work especially well as sensory friendly STEM activities for kids who find traditional, sit-still classroom formats overwhelming. The tactile, self-paced nature of a sensory bin or a texture box gives a child room to explore at their own speed.
12 Sensory STEM Activities to Try This Week
Here’s a working shortlist. Each one names the sense involved, the science concept underneath it, a rough age range, and how long it actually takes to set up (not counting cleanup).
- Magnetic sensory bottle. Sight and touch teach magnetism. Ages 2+, about 10 minutes. Fill a sealed bottle with baby oil and metal shavings or beads, then run a strong magnet along the outside. A neodymium magnet produces the most dramatic effect, and oil-based liquid keeps metal pieces from rusting.
- Oil and milk sensory bin. Sight teaches immiscibility and density. Ages 3+, 10 to 20 minutes. Vegetable oil and milk with a few drops of food coloring never fully mix, and the droplet patterns are mesmerizing to watch form.
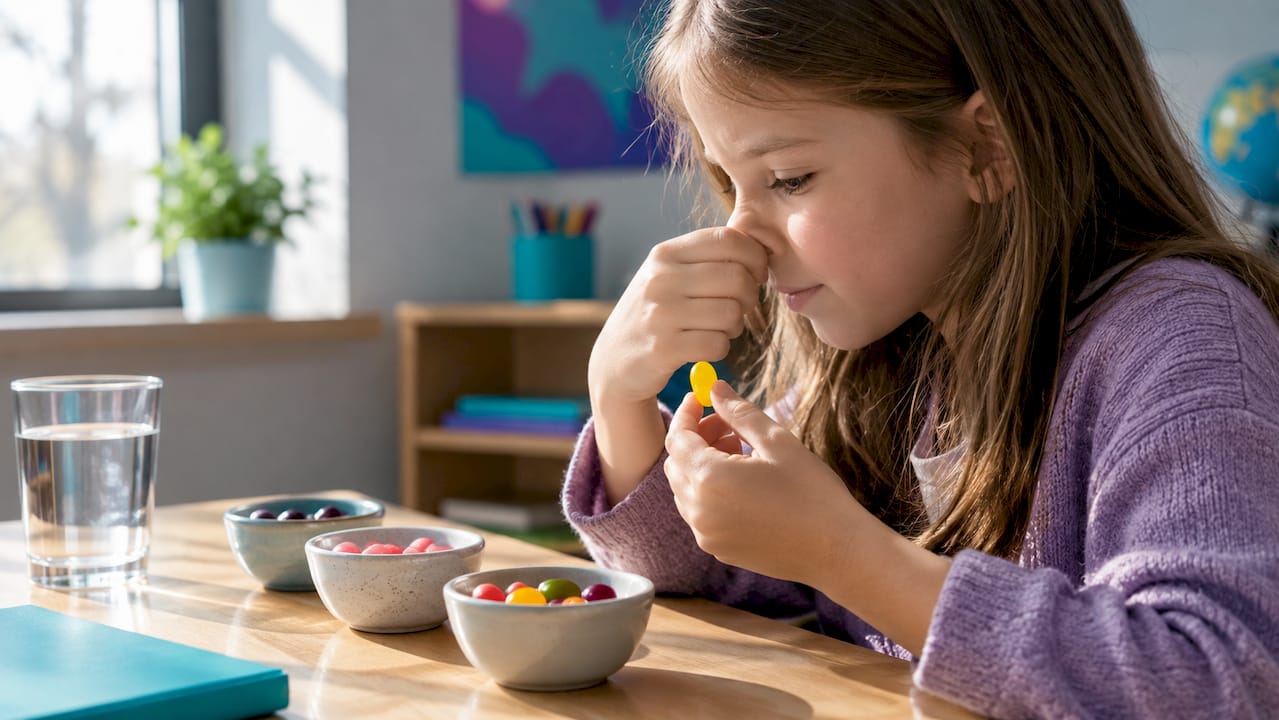
- Jelly bean taste test. Taste and smell teach flavor perception. Ages 4+, 15 to 45 minutes depending on group size. Kids taste jelly beans first while pinching their nose shut, then with their nose unpinched, and compare how their flavor perception changes.
- Sound cups. Hearing teaches acoustics and careful observation. Ages 3+, 10 to 15 minutes. Sealed cups filled with different materials get shaken and matched by sound alone.
- Sink-or-float density hunt. Touch and sight teach buoyancy. Ages 3+, 10 to 20 minutes. A bin of water and small household objects turns into a sorting experiment.
- Color-taste test. Sight teaches perceptual bias. Ages 5+, 20 to 45 minutes. Clear drinks dyed unexpected colors reveal how much vision shapes what we think we taste.
- Slime or gel exploration. Touch teaches polymers and viscosity. Ages 4+, 15 to 30 minutes. Stretching, squeezing, and pouring slime is a lesson in states of matter that doesn’t feel like a lesson.
- Sensory rain cloud. Sight teaches condensation and basic weather. Ages 4+, 20 to 30 minutes. Shaving cream “clouds” on water release colored droplet “rain” as they saturate.
- Texture sorting box. Touch teaches tactile discrimination. Ages 2+, 5 to 15 minutes. A mystery box of textured objects gets sorted by feel alone, no peeking allowed.
- Scent matching. Smell teaches olfactory discrimination. Ages 4+, 10 to 20 minutes. Small jars of spices or extracts get matched by scent with eyes closed.
- Bubble wall. Touch and sight teach surface tension. Ages 3+, 10 minutes. Dish soap and water on a taut string frame produce giant, poppable bubble films.
- Ice excavation. Touch and sight teach states of matter. Ages 3+, prep the night before, 15 to 20 minutes active time. Small toys frozen in a block of ice get “rescued” with warm water and salt.
Most of these need nothing you don’t already own. That’s intentional. Sensory STEM works best when the barrier to starting is almost zero.
How to Run Each Activity Step by Step
Sight-based experiments
Magnetic sensory bottle: Fill a clear plastic bottle three-quarters full with baby oil, add small metal washers or beads, then seal the cap with hot glue. Run a strong magnet slowly along the outside and watch the pieces jump and cluster. Ask, “What happens when you move the magnet faster?” For toddlers, skip the vocabulary and just narrate what’s happening. For early elementary kids, have them sketch a prediction before testing it.
Oil and milk sensory bin: Pour milk into a shallow tray, add a layer of vegetable oil on top, then drop in food coloring with a pipette. Watch the colors bloom and sink through the oil layer without ever fully blending into the milk. Ask, “Why do you think the colors don’t mix evenly?” The density difference between oil and milk is what causes the slow-motion swirl. Add a drop of dish soap for older kids to see the reaction change entirely.
Color-taste test: Prepare two cups of the same drink, but dye one an unexpected color, like green lemonade. Have kids taste both and describe the flavor before you reveal they’re identical. Vision reliably overrides taste expectations in this activity, which makes it one of the most memorable “aha” moments in this entire list. For younger children, keep it to one comparison. For older kids, run three or four color variations and graph how often they guessed wrong.
Sound-based experiments
Sound cups: Fill several opaque cups with different fillings, rice, beans, cotton balls, and seal the tops. Shake each one and have children match cups by sound before peeking inside. The Exploratorium’s Sound Cups protocol works especially well in groups because kids can trade cups and compare notes on what they hear. Toddlers just enjoy the shaking and the surprise. Early elementary kids can rank cups from quietest to loudest and explain their reasoning.
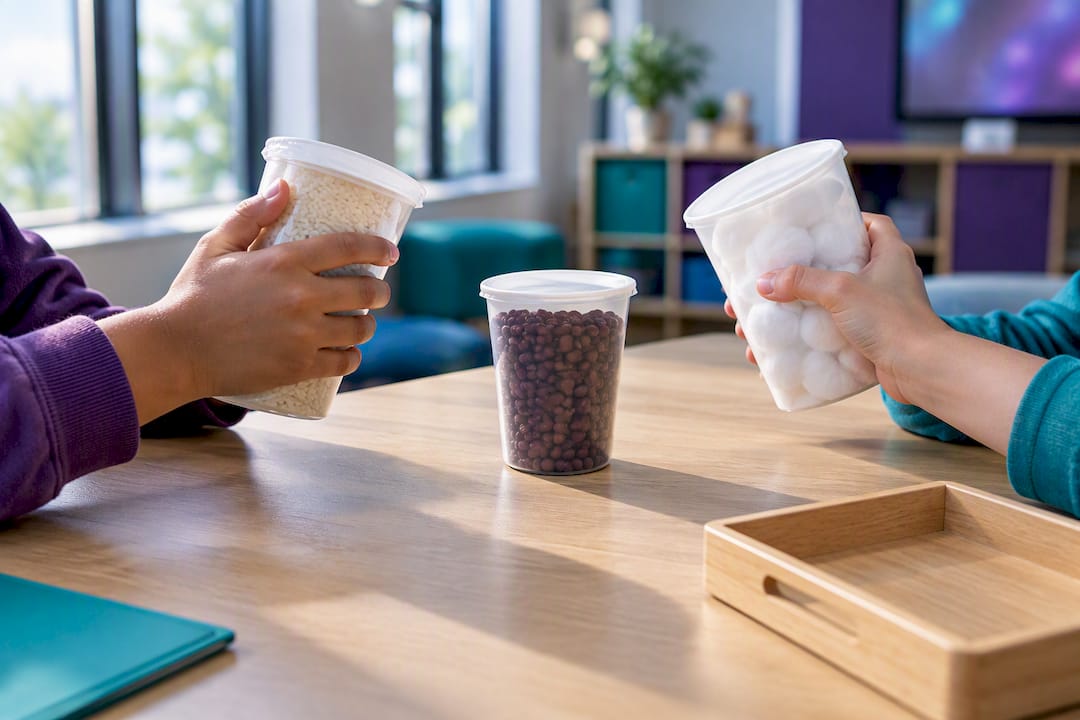
Pro Tip: Label the bottom of each sound cup with a tiny sticker code instead of writing the contents in plain sight, that way the activity can be reused across multiple sessions without kids memorizing the answers.
Touch-based experiments
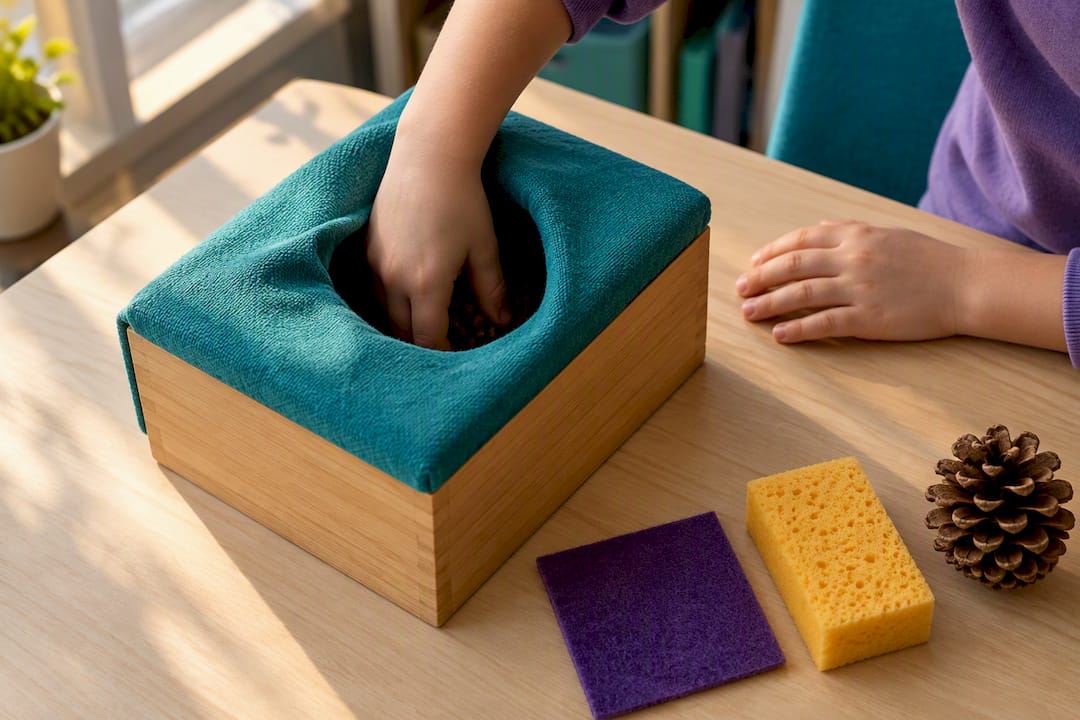
Texture sorting box: Fill a covered box with items of contrasting textures, like sandpaper, felt, a sponge, and a pinecone. Have children reach in without looking and describe what they feel before guessing the object. Build sensory vocabulary here: rough, smooth, bumpy, squishy. For toddlers, use just two or three items. For older kids, add a sorting chart with categories.
Slime or gel exploration: Mix white glue, warm water, and a pinch of borax substitute like liquid starch, then knead until it forms slime. Let kids stretch it, poke it, and observe how it behaves differently from a solid or a liquid. Ask, “Does it bounce back or stay stretched?” That question alone introduces the idea of viscosity without ever naming it directly.
Smell and taste experiments
Jelly bean taste test: Give each child a jelly bean, have them pinch their nose shut, chew, and guess the flavor. Then have them release their nose mid-chew and guess again. Flavor identification becomes significantly harder without smell, and most kids are stunned by how differently the same candy tastes. Check for allergies before running this activity, and use individually wrapped candy for sanitation. Record guesses on a simple tally sheet so the class can compare results afterward.
Scent matching: Fill small opaque jars with spices, extracts, or dried herbs, and have kids match scent to a picture card. Keep flavors and scents consistent across every trial so results are comparable. For younger kids, use two or three strongly distinct smells, like cinnamon and mint. For older kids, add subtler pairs that force a closer sniff.
Prep Hacks and Group Management for Busy Classrooms
Most of these activities pull from the same short list of pantry and craft items: vegetable oil, milk, dish soap, food coloring, baby oil, magnets, cups, rice, beans, and glue. Keep a dedicated bin of these staples and setup time drops close to five minutes.
- Swap baby oil for a light cooking oil if that’s what’s on hand, the sensory bottle effect barely changes.
- Use liquid starch instead of borax for slime, it’s gentler and just as effective for classroom batches.
- Hot glue every bottle cap shut before handing bottles to toddlers, this prevents spills and keeps small parts contained.
- For taste and smell activities, use individually wrapped candy and single-use jars or cups, never a shared spoon or open container.
- Wash sensory bins with warm soapy water between groups when food items are involved.
For a 45-minute classroom block, split the room into three stations of 15 minutes each and rotate groups through sight, sound, and touch activities. This keeps energy up and avoids the slow drag of one activity stretched too long.
Pro Tip: Pre-portion taste-test candies into labeled cups the night before, this alone can cut a rushed morning setup down to under three minutes.
Cleanup goes faster with a simple checklist: wipe bins, seal leftover slime in a bag, return magnets to a labeled box, and toss single-use taste-test cups immediately.
What Kids Actually Learn From These Activities
Every sensory activity on this list builds a specific, observable skill, not just a fun ten minutes, as explained in this parent’s guide to sensory play and child development.
- Observation: noticing color changes, sound differences, or texture shifts without prompting.
- Questioning: asking “why” before being told the answer.
- Measuring: comparing amounts, sizes, or time, even informally.
- Classifying: sorting objects or results into groups based on shared traits.
- Fine motor skills: pouring, pinching, pipetting, and stirring.
- Sensory discrimination: telling apart similar sounds, textures, or scents.
For the jelly bean taste test, a simple tally sheet works well: one column for “guessed correctly with nose pinched,” one for “guessed correctly with nose open.” Turning that into a bar graph gives even a five-year-old a visual result they helped create. TeachEngineering’s taste perception lessons follow this same format, pairing a clear learning objective with a simple data step.
These activities align naturally with early-learning science practices like asking questions, planning simple investigations, and using evidence to support a claim. A good reflection prompt afterward: “What surprised you the most, and why do you think that happened?”
Turning One Activity Into a Multi-Day Investigation
A single sensory activity can stretch into several sessions once you introduce a variable. Change one ingredient at a time in the slime recipe, for instance, more water versus less, and ask kids to predict what will happen before testing it.
- Combine two senses into one project, like dyeing the jelly beans different colors before the taste test to explore whether color changes their guess.
- Run the sound cups activity again a week later with new fillings and ask kids to explain what strategy helped them guess correctly last time.
- For older children, introduce a simple rubric: one point for a clear prediction, one for accurate observation, one for a reasonable explanation.
- Keep a running science journal where kids draw or write one sentence per activity, this becomes a visible record of growth over a semester.
Longer investigations also fit naturally into thematic units, weather for the sensory rain cloud, states of matter for slime and ice excavation, or the five senses as a standalone unit tying every activity together.
How Team Genius Squad’s Kits Build on Sensory Science
Team Genius Squad built its kits around a framework called the E³ Method: Engage, Encourage, Empower. A child engages with a hands-on experiment first, gets encouraged through role-play and storytelling, then walks away empowered with a new identity as a young scientist, not just a completed craft project.
DIY works well for a single quick activity on a weeknight. A kit earns its place when you want the materials pre-measured, the instructions written for a child’s reading level, and a role-play layer, like a lab coat, that turns the experiment into an identity moment. For classrooms or group birthday parties, a Meet Ava virtual session can carry the facilitation entirely, freeing up the adult in the room. Readers who want more DIY ideas first can browse more hands-on science projects before deciding.
Why the Loudest Kid Isn’t Always the Most Engaged One
The instinct in a room full of children is to chase the activity that gets the biggest reaction, the loudest gasp, the messiest bin. But the quiet kid carefully re-sorting the texture box for the third time is often doing the deeper science. Sustained, repeated observation is where real learning happens, not the initial jolt of surprise.
If you take one thing from this list, make it this: pick a single testable question, like “does color change what you taste,” and pick one simple way to record the answer, a tally mark, a drawing, a bar graph. Depth beats variety almost every time.
— Tita
Ready to Skip the Prep? Try a Team Genius Squad Kit
Team Genius Squad turns the same sensory-first ideas in this article into a done-for-you experience, no last-minute grocery run required. If the slime and gel section caught your attention, the Diving into Slime, Gel, and Goop kit delivers pre-measured tactile chemistry with a lab coat and role-play card included. For edible chemistry that echoes the jelly bean taste test, the Just Add Sugar kit turns sugar science into a hands-on story.
If your child or classroom would benefit from a live facilitator instead of a printed instruction sheet, Meet Ava offers a 30-minute one-on-one Zoom session for $50, a virtual group entrepreneurship experience for $550, or an in-person group STEM experience for $1,100, each built around the same Engage, Encourage, Empower framework behind every kit. Browse the full experiment kit collection to match a kit to whichever sense sparked the most curiosity in your house this week, and start with the one that felt the most fun to read about.
Sources
- NINDS: The Jelly Bean Test — Science Activity Guide
- Exploratorium education (Snacks and classroom activities)
- Science Buddies: Color Taste Test
- Magnetic sensory bottles – One Little Project
- Oil & Milk Science Sensory Bin
FAQ
What Are Examples of STEM Activities for Young Children?
Magnetic sensory bottles, oil and milk sensory bins, sound cups, and jelly bean taste tests are all strong examples because they teach one science concept through direct observation. Each takes 10 to 20 minutes and uses household materials, making them realistic for a weeknight or a classroom station.
What Are Some Fun Five-Senses Activities?
A scent-matching jar activity covers smell, a sound cups activity covers hearing, and a texture sorting box covers touch, all in under 15 minutes each. Pairing three or four of these into one session gives kids a full tour of sensory science in a single afternoon.
What Are Good 45-Minute STEM Activity Ideas?
Split a 45-minute block into three 15-minute stations, one for sight (oil and milk bin), one for sound (sound cups), and one for touch (slime exploration). This rotation keeps energy high and avoids dragging any single activity past a child’s attention span.
What Are Examples of Sensory Activities Specifically?
Texture sorting boxes, magnetic sensory bottles, and scent-matching jars are classic sensory activities because they isolate a single sense and pair it with a clear, testable question. The jelly bean taste test is a standout because it also teaches that taste and smell work together, not separately.
Do I Need a Kit, or Can I Just Do This at Home?
Household items work fine for a single activity done once. A kit from Team Genius Squad’s experiment collection makes more sense when you want pre-measured materials, reading-level instructions, and a role-play element built in for repeat use.


Leave a comment
This site is protected by hCaptcha and the hCaptcha Privacy Policy and Terms of Service apply.