Science Supplies Storage: A Safe, Simple System for Kids 5–13
The best way to store science supplies for children ages 5 to 13 is to sort first and buy containers second. Take inventory, split reusable from consumable items, separate what children may grab from what an adult hands out, and then put like things in labeled bins with words and pictures. Do that, and a classroom shelf, a homeschool corner, a counselor’s cabinet or a grandparent’s activity closet starts working for the child instead of against the adult.
This guide walks through that system step by step. It also covers the part many storage posts skip: anything hazardous needs a different kind of storage, and a cute bin does not make it safe.
TL;DR
- Work in four passes: inventory, reusable versus consumable, child-accessible versus adult-managed, then labeled bins.
- Keep only low-risk materials where children can reach them. Chemicals and anything hazardous stay adult-controlled, labeled and out of reach.
- Match the container to the problem: closed cases for small parts, clear bins for visibility, caddies for active work, rolling carts for moving between rooms.
- Label with both words and photos so younger and emerging readers can find and return things on their own.
- Review your stock at least once a year and buy only what you can use up.
Table of Contents
- Why storage is about more than tidiness
- Step 1: Take inventory before you buy anything
- Step 2: Split reusable from consumable
- Step 3: Decide what children can reach
- Step 4: Handle chemicals and hazardous items separately
- Choose the container for the problem you have
- Label so every child can read the system
- Match height to how often you use it
- Build a mobile station if you share space
- Keep a yearly rhythm
- Where our kits fit
- Our perspective: a system children can own
- FAQ
- Sources
Why storage is about more than tidiness
A tidy shelf saves setup time. A well-planned one also does three other jobs: it protects children, it protects your supplies, and it lets kids take part in their own learning.
The American Chemical Society’s school guidance treats storage as risk control. Location, access, incompatibility, labeling and emergency planning matter more than matching containers, according to its 2025 guidelines for teaching middle and high school chemistry. That document is written for older students, so for children 5 to 13 we borrow its caution and make it stricter: if something is hazardous, an adult manages it.
There is also a confidence angle. A child who can find the magnifying glass, use it and put it back has just practiced independence. For children who struggle with reading, writing or organization, a predictable system removes a lot of friction before the experiment even starts.
Step 1: Take inventory before you buy anything
Empty every drawer, tote and cabinet that holds science or STEM items. Put everything on a table or floor and write down what you have. A phone photo of each pile and a simple list is enough.
This step usually turns up three things: duplicates you can consolidate, broken or dried-out items to throw away, and gaps that tell you what to buy. Experienced elementary STEM teachers describe this same order of operations. Browne’s Bunch of STEM suggests knowing what you have first, so that a direction like “top bin to the right” always leads to the same thing.
Typical items to look for:
- Measuring tools: rulers, measuring tape, scales, magnifying glasses
- Building materials: blocks, string, tape, scissors, paper, glue
- Project recyclables: cardboard, tubes, containers
- Small parts: batteries, wires, clips, magnets
- Anything in a bottle, jar or packet that is not plain craft material
The commonly recommended supplies list from Simply STEAM Education includes rulers, measuring tape, magnifying glasses, scales, calculators, string, blocks, tape, scissors, paper, glue and recyclables. It is a handy checklist if you are starting from a mostly empty cabinet.
Step 2: Split reusable from consumable
Reusable items come back after every activity. Consumables get used up. They need different bins and different restocking habits.
| Category | Examples | Where it lives | How you restock |
|---|---|---|---|
| Reusable | Magnetic tiles, building bricks, rulers, scales, magnifiers | Open or clear bins at child height | Count at cleanup, replace losses |
| Consumable | Cardboard, pipe cleaners, tissue paper, paper-towel rolls | Bulk bin or shelf, with a small “working” bin out front | Refill the working bin weekly |
The reusable versus consumable split, with magnetic tiles and bricks on one side and cardboard, pipe cleaners, tissue paper and paper-towel rolls on the other, comes from Browne’s classroom approach. The practical benefit is that you stop hunting for the one good ruler under a mountain of paper tubes.
If you collect recyclables, set a cap. One bin per type, and when the bin is full, you stop collecting. Our guide to classroom-ready recycled STEM projects shows how to put those materials to work so they do not pile up.
Step 3: Decide what children can reach
This is the most important decision in the whole system. Not every material should be available to every child at every moment.
Browne’s approach makes accessibility intentional rather than universal. Students independently use routine materials, while messy, scarce or adult-supervised ones stay available through an adult. We agree, and for ages 5 to 13 we would draw the line like this.
Child-accessible (low risk):
- Paper, craft components, tape, string
- Measuring tools
- Building sets with parts larger than a young child can swallow
- Approved parts from a kit your child is currently using
Adult-managed:
- Anything that is a chemical, even a familiar one in a plain jar
- Scissors and tools for younger children, depending on your setting
- Small magnets and button batteries around any child who may put things in their mouth
- Scarce or expensive items you want to protect
The Educators Spin On It offers a rule worth adopting: choose materials for the youngest child present. If a seven-year-old and a toddler share the space, small objects and magnets are off the shelf, whatever the older child could handle.
For a deeper look at safety checks before you bring a kit home or into class, see our post on science kit safety: three checks parents and teachers need.
Step 4: Handle chemicals and hazardous items separately
Most elementary activities need nothing more hazardous than vinegar, baking soda or food coloring. Even so, these are the items that cause the most trouble when they end up in the wrong place, so they get their own rules.
For school chemistry, the ACS says chemicals should be stored methodically in designated, locked areas. They should not be stored alphabetically where incompatibility is a concern. They should be separated by hazard category: acids, bases, oxidizers, organics and flammables. Equipment is stored separately from chemicals. Those are the 2025 ACS guidelines. They also call for Safety Data Sheets and compliance with local and state requirements. If you run a school lab or any space with real laboratory chemicals, check with your district’s science or safety lead.
For home and elementary use, a practical translation is:
- Keep anything beyond basic kitchen-pantry items in a closed cabinet or box, out of reach and out of sight.
- Never put chemicals on the same shelf as food, snacks or drinks.
- Keep the original packaging, with its label and instructions, instead of pouring things into other containers.
- Store tools and equipment separately from consumable supplies.
Labels are not optional
Federal workplace guidance is blunt on labeling. OSHA’s laboratory labeling fact sheet says hazardous-chemical containers need the chemical identity and hazard information. A secondary container generally needs a label when contents stay beyond the transferor’s work shift, are moved, or are left after the person who filled it leaves. That is written for workplaces, but the habit transfers well: never keep an unlabeled liquid just because it is in a familiar jar or beaker.
OSHA’s laboratory safety guidance adds that safe storage depends on hazard communication and training, so people must know the hazards and where safety information lives. With children, that means adults, not kids, control hazardous-material access and instruction. A child-friendly bin is not a safety system.
If a particular ingredient worries you, stop and ask a pediatrician, your school nurse or your local poison control center before you store it or let a child use it.
Choose the container for the problem you have
Practitioners agree that the right container depends on what goes wrong most often. Carly and Adam’s STEM storage hacks make the same point: closed cases stop small electronic pieces from vanishing, clear bins cut searching, caddies support active work and rolling carts reduce carrying.
| Problem | Best container | Why it works |
|---|---|---|
| Tiny parts keep disappearing | Fitted, closed case or sliding pencil box | Nothing escapes, and a missing piece is obvious |
| Kids can’t find things | Clear plastic bins or clear shoebox containers | You see the contents without opening |
| Supplies migrate across the room | Caddy | One handle carries a whole activity to the table |
| Activities move between rooms | Rolling cart | No repeated carrying or unpacking |
| Many small categories | Pencil boxes inside a larger bin | Two levels of order |
Avoid buying anything until your inventory and sorting are done. The most common storage mistake is a cart full of bins that don’t match what you actually own.
Small electronics deserve a closed case
Circuit components, wires, clips, batteries and micro-controller parts are the first things to get lost. The classroom practitioners at Carly and Adam describe clear cases or sliding pencil boxes for these pieces. Give each kit its own fitted container instead of an open basket. Our Electricity Lab Experience Bundle is the kind of activity where a closed, labeled home for small parts pays off quickly.

Label so every child can read the system
Labels do the quiet work of independence. The Simply STEAM Education guidance recommends labels with both text and photographs, which help younger and emerging readers find and return materials without asking. This also helps children with dyslexia or other reading differences, because the picture carries the meaning when the word is hard.
A simple labeling recipe:
- Take a photo of the item in its bin.
- Print it small with the word in large, plain, uppercase or sentence-case type, whichever your child reads most easily.
- Tape over the whole label with clear packing tape so it survives sticky fingers.
- Put the same label on the shelf spot, so “home” is obvious.
Use color sparingly. One color per category (building, measuring, art) is easier to remember than a rainbow for every bin.
Match height to how often you use it
Put daily-use supplies at child or student reach and push seasonal or occasional items higher or into a cabinet. That is the rule in the Simply STEAM Education tips, and it is the easiest rule to follow.
A useful layout for a standard shelving unit:
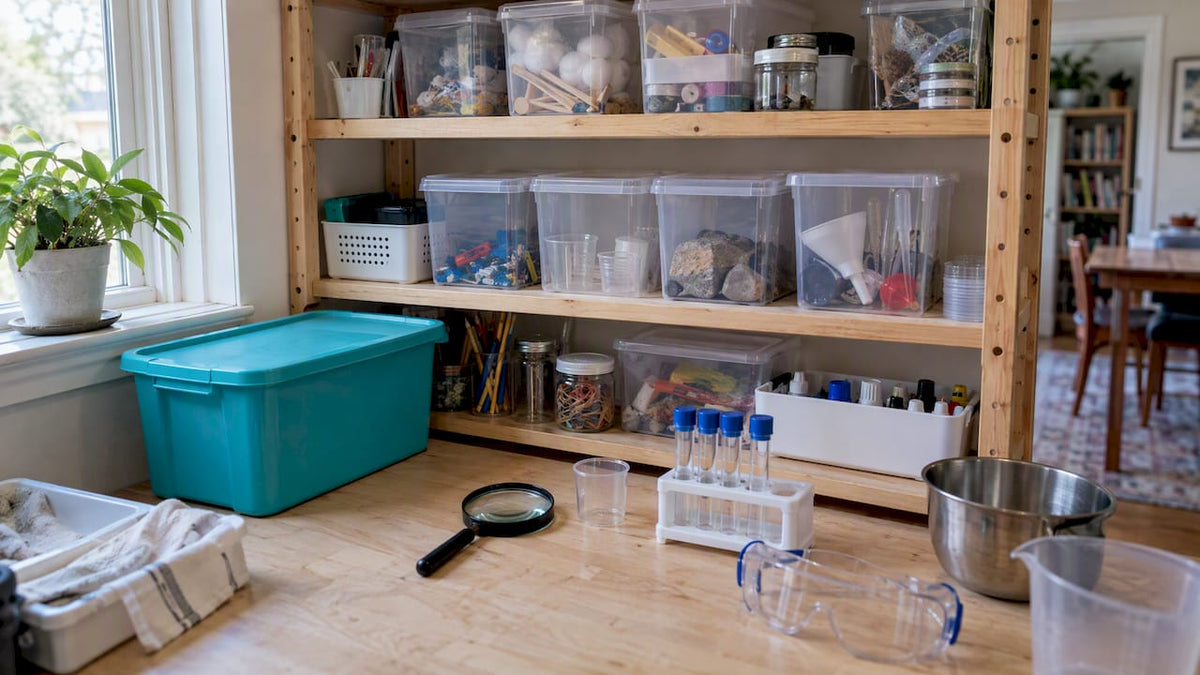
- Bottom shelf: reusable building materials and measuring tools
- Middle shelf: working bins of consumables
- Top shelf or cabinet: bulk refills, seasonal items, anything adult-managed
- Locked or closed container, out of reach: anything hazardous
Build a mobile station if you share space
Counselors, tutors, homeschool families and teachers who rotate rooms all benefit from a station on wheels. The Educators Spin On It turned an ordinary desk into a mobile STEM lab. Its approach works best when each challenge has its own prepared bag or container and when supplies are grouped by type. Wheels make it possible to rotate stations without unpacking every time. The same source treats child-sized setup as part of the learning design, because comfortable participation keeps focus.
To build your own cart:
- Choose one prepared container per activity, labeled with the activity name.
- Add a shared caddy of basics: tape, scissors, rulers, markers.
- Keep a small closed case for tiny parts.
- Put an index card on top listing what should be in each bin, so cleanup doubles as a count.
If you want ideas for what to put in those bins, our 15 inclusive low-prep STEM bin ideas and our post on STEM sensory bins are good starting points. For families setting up at home, the home science lab setup guide starts with goggles and keeps costs low.
Keep a yearly rhythm
Storage decays. Bins get raided, labels peel, and new supplies arrive without a home. Two habits keep things fresh.
First, review stock at least once a year. The ACS chemical safety manual for teachers is a good reference for teachers handling chemicals. Its practitioner-level habit is to buy quantities that can be consumed within a year, ideally in small direct-use containers, which reduces forgotten stock, waste and unnecessary transfers. We apply the same idea to every supply: if you won’t use it this year, don’t stockpile it.
Second, make cleanup part of the activity. Ending with a two-minute “return everything home” routine teaches responsibility and keeps the system alive. A child who puts the magnifying glass back on its photo label is practicing the same sequencing and attention skills that science itself asks for.
Where our kits fit
If you are building a space around ready-made activities, the kit itself can anchor a bin. Our hands-on, screen-free experiment kits are designed for children ages 5 to 13, with role play, reading, writing and reflection built in. Once a kit is opened, give it a labeled home with a photo, keep its small parts in a closed case, and set it where the child who uses it can reach it. You can also browse our lesson plans if you are organizing materials for a group.
Our perspective: a system children can own
We started Team Genius Squad from a real family journey with dyslexia and dysgraphia, and that experience shapes how we think about storage. When a child finds reading labels or sorting by abstract categories hard, a messy shelf is not a small annoyance. It is one more reason to decide that science “isn’t for me.”
So we think of storage as the first step of our E³ Method: Engage, Encourage, Empower. A bin with a photo on it engages a child, because they can see what is inside. A shelf they can reach encourages them, because they don’t have to ask permission for every small thing. A routine for returning supplies empowers them, because they run their own lab.
That is also why we draw such a firm line around hazards. Confidence grows when children succeed safely, and the adult’s job is to make the safe path the easy one. Give children plenty of low-risk materials they can reach, keep anything risky under adult control, and let them step into the role of scientist with a lab coat, a badge and a place for everything.
— Tita
FAQ
How do I organize lab supplies for a children’s science space?
Start with an inventory, then sort into reusable and consumable items, and then into child-accessible and adult-managed groups. Put like items together in labeled bins with words and pictures. Keep anything hazardous in a separate, closed place that an adult controls.
What are science containers called?
The everyday containers in a children’s space are bins, caddies, pencil boxes, clear shoebox containers and rolling carts. Laboratories also use beakers, flasks and labeled reagent bottles, but those are not appropriate to leave within a child’s reach. If you transfer anything into another container, label it.
Where should I keep chemicals around kids?
Keep them in a closed or locked area that children cannot open, away from food, and separate from tools and equipment. School chemistry guidance from the American Chemical Society calls for designated, locked storage organized by hazard. For a specific product, read its label and ask your school safety lead or poison control center.
How do I store small STEM parts so they stop getting lost?
Give each kit a fitted, closed container, such as a clear case or sliding pencil box, rather than an open basket. Add a card listing the parts so you can count at cleanup. Keep the case out of reach of any child who may mouth small objects.
Sources
- ACS Guidelines and Recommendations for Teaching Middle and High School Chemistry (2025)
- Chemical Safety for Teachers and Their Supervisors
- OSHA: Laboratory Safety Labeling and Transfer of Chemicals
- OSHA: Laboratory Safety Guidance
- How to Organize STEM Materials in Your Elementary Classroom
- Organization Tips for Teaching: STEM Supplies
- Storing STEM Activities for Kids: Make a Mobile STEM Lab
- The Best STEM Storage Hacks for Your Classroom

Leave a comment
This site is protected by hCaptcha and the hCaptcha Privacy Policy and Terms of Service apply.