
Make Lab Safety Rules Stick at Home for Ages 5–13 With Role Play
Before any home STEAM experiment for kids ages 5 to 13, the rule is simple: read every instruction first, set up a clear and ventilated workspace, enforce the right protective gear, stay within arm’s reach the entire time, and check the kit against active recall lists. Guidance from the American Chemical Society and the NSTA backs every piece of it, and Some STEAM kits are built around that same standard.
TL;DR:
- Most injuries happen when safety rules are skipped or ignored, not because of unclear instructions but due to boredom or carelessness.
- Proper eye protection depends on the activity type; splash goggles are needed for liquids, while safety glasses with side shields suit mechanical tasks.
- Recalls in science kits often involve hidden hazards like lead paint or overheating packs; always check the CPSC database before use.
- Active supervision means being physically present, directly overseeing risky steps like mixing or heating, especially for children under 8.
- Using role-play elements like safety glasses or lab coats helps children internalize safety routines by adopting the identity of a scientist.
Table of Contents
- Lab Safety Rules for Kids: The Checklist Every Parent Should Follow
- How to Set Up a Safe Workspace and Choose the Right Gear
- Picking Safe Experiments and Materials for Ages 5 to 13
- What Active Supervision Actually Looks Like
- First Aid for Spills, Burns, Cuts, and Eye Exposure
- Checking Recalls and Storing Materials Safely
- Why Safety Rules Stick Better When Kids Feel Like Real Scientists
- Where Team Genius Squad Fits Into Your Safety Plan
- A Few Words From Teamgeniussquad on What Actually Keeps Kids Safe
- Sources
- FAQ
Lab Safety Rules for Kids: The Checklist Every Parent Should Follow
Good lab safety rules for kids aren’t a lecture. They’re a rhythm: something you do before, during, and after every single activity until it becomes second nature for both of you. Break it into three phases and it stops feeling like a chore.
- Read the whole instruction sheet first, start to finish, before your child touches a single piece. Do a quick hazard check as you go: what could go wrong, how likely is it, and what will you do about it.
- Inspect the kit contents against the parts list and check the CPSC recall database for that product before you open a single packet.
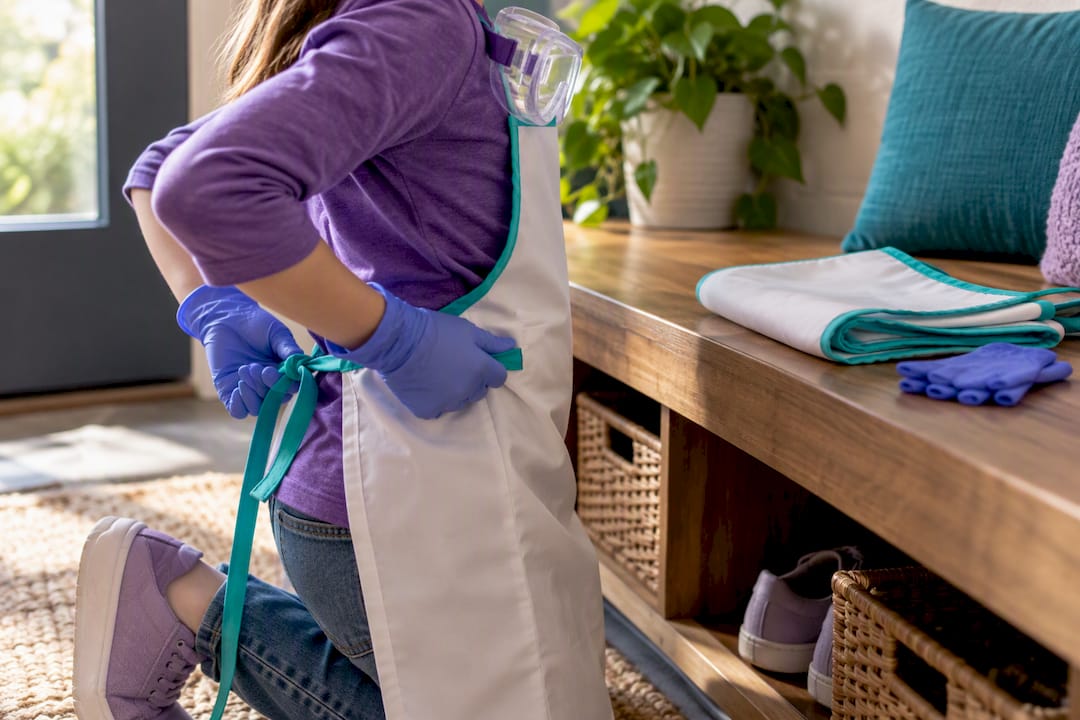
- Suit up before starting: goggles, an apron or old shirt, gloves if the activity calls for them, hair tied back, sleeves pushed up.
- Stay within reach during mixing, heating, or pouring steps. No food or drinks anywhere near the workspace.
- Never substitute ingredients the instructions don’t call for, even ones that seem harmless.
- Clean up together, label and store any leftover materials, and wash hands before doing anything else.
Pro Tip: Keep a small “mission checklist” card taped to your experiment shelf. Kids who see the same three icons (goggles, hands, cleanup) before every activity start enforcing the rules on themselves within a few sessions.
How to Set Up a Safe Workspace and Choose the Right Gear
A safe workspace is not glamorous. It’s a stable table, good airflow, and nothing nearby that can catch fire, spill, or get knocked over.
- Work on a hard, wipeable surface, never carpet or a bed.
- Crack a window or work near a fan if the kit mentions any odor, gas, or vapor.
- Clear the area of pets, siblings, and clutter before you start.
- Keep a damp towel, water source, and basic first-aid kit within a few steps of the table.
Eye protection is where most families guess wrong. Splash goggles that seal against the face are the standard for anything liquid, poured, or mixed, while basic safety glasses with side shields cover dry, mechanical activities like sanding or hammering. This distinction comes straight from NIOSH’s first-aid and eyewear guidance, and it matters more than most parents realize: regular glasses, sunglasses, and even swim goggles don’t meet the same splash-sealing standard.
Nitrile or vinyl gloves belong on anything involving dye, acid, or a strong-smelling reagent. A non-latex apron and closed-toe shoes round out the basics, and a stray shoelace or open sandal near a heat source is an easy problem to avoid. One detail that surprises a lot of parents: contact lenses are not protective eyewear. NIOSH is clear that a child wearing contacts still needs properly fitted goggles, since lenses can trap chemicals against the eye during a splash.
Picking Safe Experiments and Materials for Ages 5 to 13
Age labels on a kit exist for a reason, and skipping past them because a child seems “advanced” is one of the more common mistakes parents make. A kit rated for 10 and up may include a step that genuinely needs an adult’s hands, not a curious eight-year-old’s.
Six hazard categories account for most home mishaps:
- Chemical: strong acids, bases, or bleach-based reagents that can burn skin or eyes.
- Thermal: hot plates, candles, or anything requiring an open flame.
- Electrical: frayed wires, exposed battery terminals, or overloaded circuits.
- Choking: small magnets, beads, or loose parts for kids under 6.
- Magnets: high-powered sets that can pinch or, if swallowed, cause internal injury.
- Lasers: the FDA warns that children’s laser products should carry an IEC Class 1 label and should never be aimed at eyes or faces.
Swapping ingredients is where good intentions backfire. The Exploratorium points out that using ordinary table salt in an electrolysis experiment instead of the specified solution can produce chlorine gas, a swap that looks harmless on paper and isn’t. If a kit calls for a specific reagent, use that reagent. When an activity produces gas, foam, or pressure, like a sealed baking-soda reaction, take it outside or to a sink first and test containment before scaling it up.
What Active Supervision Actually Looks Like
“Supervised” doesn’t mean sitting in the next room. For kids in the 5 to 13 range, active supervision means physically present, hands free, and watching the step that matters most.
- Read through the full activity yourself before your child sees it, and pre-stage every material in the order it’s needed.
- Stand directly next to your child during any mixing, heating, or pouring step, no exceptions.
- Handle batteries, heat sources, or sharp tools yourself if the child is under 8 or new to the kit.
- Keep younger siblings and pets out of the workspace entirely during the activity.
Supervision isn’t one size fits all. A confident 12-year-old might measure and mix independently while you watch from a step away, while a child who benefits from extra structure, including many neurodivergent learners, does better with the task broken into smaller, narrated steps. Neither approach is wrong; matching the supervision level to the child is the actual skill.
A quick allergy check and a one-line safety acknowledgment, something as simple as “I will wear my goggles and ask before touching chemicals,” go a long way. NSTA recommends this kind of light documentation even for home science instruction, and older kids can handle a two-question safety quiz before their first solo step.
First Aid for Spills, Burns, Cuts, and Eye Exposure
Most home experiment injuries are minor, and knowing the right first move keeps them that way.
- Eye exposure: flush immediately with large amounts of clean water while gently lifting the eyelid, and keep flushing on the way to care if the substance was caustic, per NIOSH guidance.
- Swallowed or ingested substances: keep the container in hand, call Poison Control, and follow their exact instructions. Never induce vomiting unless a specialist tells you to.
- Burns: run cool (not ice-cold) water over the area for at least 10 minutes, then cover loosely. Anything deep, blistered, or larger than a few inches needs emergency care.
- Cuts: apply firm, direct pressure with a clean cloth and elevate the area if bleeding doesn’t slow within a few minutes.
Pro Tip: Tape the Poison Control number (1-800-222-1222) directly onto your first-aid kit. In a real spill, nobody wants to be searching a phone for it.
Stop the activity immediately and call 911 for a chemical burn covering a large area, breathing trouble, or a suspected laser eye injury. Keep product labels and any included safety data sheets within reach for the whole session, since first responders will ask what your child was exposed to.
Checking Recalls and Storing Materials Safely
Before you ever hand a kit to a child, open the box and match every item against the parts list. Look specifically for unlabeled bottles, a battery pack that feels warm or loose, and any small part that could pass a choking-hazard test.
- Search the product name in the CPSC recall database before first use; recalls have covered lead paint, overheating packs, and mislabeled bottles in kits marketed for kids.
- Stop using anything recalled or visibly damaged, and contact the vendor rather than improvising a fix.
- Store chemicals in their original, labeled containers with child-resistant caps, never in food or drink containers.
- Lock hazardous materials in a cabinet out of reach between sessions.
- Follow the label’s disposal instructions exactly rather than guessing.
Why Safety Rules Stick Better When Kids Feel Like Real Scientists
Kids don’t remember lectures about safety. They remember rituals. That’s the whole idea behind pairing safety rules with Teamgeniussquad’s E³ Method, which moves a child from Engage to Encourage to Empower instead of just handing over a warning label.
A child who puts on a youth lab coat with safety glasses before an experiment isn’t just protecting their eyes. They’re stepping into an identity, and identity is what makes a rule stick when nobody’s watching. Founder Ava N. Simmons built that idea out of her own family’s experience with dyslexia and dysgraphia, where traditional instructions often fell flat until they became something to perform, not just read.
Even a simple pair of protective safety glasses does double duty: it’s real PPE, and it’s also the badge that says “I’m the scientist here.” That combination is what turns a safety rule into a habit a child actually wants to keep.
Where Team Genius Squad Fits Into Your Safety Plan
None of these rules require buying anything, and a well-stocked kitchen table can run a safe experiment on its own. But if you’d rather skip the ingredient hunting and hazard math, a kit designed around these exact standards saves real time.

Teamgeniussquad’s experiment kits arrive with pre-measured materials, included PPE like lab coats and glasses, and role-play elements that turn each safety step, goggles on, hands washed, materials put away, into part of the story instead of a rule to fight about. Every kit is built for the same 5 to 13 age range covered in this guide, with neurodivergent-inspired design baked into the instructions themselves.
If your family wants a guided version of all this, Meet Ava offers live, supervised STEM experiences where a real ambassador walks kids through an experiment step by step, safety included. Browse the full shop to find the format, kit, or session that fits your child best.
A Few Words From Teamgeniussquad on What Actually Keeps Kids Safe
Most safety advice treats kids like small adults who just need clearer warnings. That’s backwards. A 7-year-old doesn’t retain a bulleted list of hazards, but they will remember the day they put on a lab coat and became “the scientist” for an afternoon.
The uncomfortable truth is that most home lab accidents don’t happen because a rule was unclear. They happen because the rule was boring enough to skip. Goggles get pushed up on foreheads. Hands get wiped instead of washed. The instruction sheet gets skimmed instead of read. Standards from the ACS and NSTA are excellent, but a standard only works once a child feels like following it is part of who they are, not an obstacle between them and the fun part.
That’s the real argument for identity-driven play in safety education. A badge, a role, a story where the child is the innovator and the protective gear is the uniform, does something a warning label never will: it makes the safe choice the cool choice. Parents who lean into that, rather than fighting it, tend to get far more consistent compliance than parents relying on repetition alone.
— Tita
Sources
- Science safety rules for kids (American Chemical Society)
- Preschool–Grade 2 science/engineering hands-on activity safety protocols (NSTA)
- Anker Play Products recalls 10-in-1 science kit (CPSC)
- Caution with caustics (Poison Control)
FAQ
What are the most important lab safety rules for kids?
The core rules are: read every instruction before starting, wear proper eye protection and gloves, keep an adult within arm’s reach during mixing or heating, avoid food and drink near the workspace, and wash hands afterward. These match the standards published by the American Chemical Society and NSTA.
What safety gear does a child need for a home experiment?
Splash goggles for anything liquid, safety glasses with side shields for dry or mechanical tasks, nitrile or vinyl gloves for chemicals or dyes, and a non-latex apron. NIOSH notes that regular glasses and contact lenses do not count as adequate eye protection on their own.
How do I know if a science kit has been recalled?
Search the exact product name in the CPSC recall database before first use. Recalls have covered issues like lead-painted parts and overheating battery packs in kits marketed for children.
What should I do if a chemical gets in my child’s eye?
Flush the eye immediately with large amounts of clean water while gently lifting the eyelid, and keep flushing if the substance is caustic while heading to medical care, per NIOSH guidance. Call Poison Control or 911 if symptoms are severe or the irritation doesn’t stop.
Does Team Genius Squad include safety gear with its kits?
Yes. Teamgeniussquad’s experiment kits include age-appropriate PPE such as lab coats and protective glasses, along with pre-measured materials designed for supervised use by kids ages 5 to 13. Pricing for individual kits is listed on the shop page.


Leave a comment
This site is protected by hCaptcha and the hCaptcha Privacy Policy and Terms of Service apply.