
Standards Aware Science Kit Safety: 3 Checks Parents and Teachers Need
Before any kit activity, put on eye protection, read the kit’s contents list and safety information, and match the experiment to your child’s age and supervision level. These three steps, done every single time, prevent the vast majority of kit mishaps. Look for kits that follow ISO 8124-10, reference CPSC safety guidance, and come from a maker like Teamgeniussquad that builds adult involvement into the design itself.
TL;DR:
- Kits should include all necessary protective gear, such as goggles, gloves, and aprons, to prevent common accidents during experiments.
- Manufacturers must comply with ISO 8124-10 standards, including clear contents lists, age guidance, and safety instructions for each kit.
- Children aged 5 to 7 should mainly observe experiments, while those aged 8 to 10 can handle basic transfers under supervision, and 11 to 13 can perform more advanced tasks with guidance.
- Safe setup involves pre-measuring reagents, working on a flat, ventilated surface near a sink, and avoiding experiments with flammable solvents or fragile glass in groups.
- Always verify label claims, store chemicals properly, and follow SDS guidance to manage accidents and disposal risks effectively.
Table of Contents
- Personal Protective Equipment and Reading a Safety Data Sheet
- What ISO 8124-10 and CPSC Guidance Actually Require
- Matching Experiments to Your Child’s Age
- Building a Safe Experiment Space at Home or in Class
- Handling Accidents, Storage, and Leftover Materials
- How Thoughtful Kit Design Cuts Down on Risk
- A Perspective on Supervised Risk and Real Learning
- Choosing Kits That Take Safety as Seriously as You Do
- Where to Verify Kit Safety Claims Yourself
- Sources
- FAQ
Personal Protective Equipment and Reading a Safety Data Sheet
Goggles, gloves, and an apron are not optional extras for a “real” lab. They are the baseline gear for any experiment involving liquids, powders, or heat, and a well-designed kit includes them in the box rather than leaving families to guess.
- Goggles protect against splashes during any reaction that fizzes, foams, or sprays, including basic vinegar-and-baking-soda geysers.
- Gloves matter most when a reagent can irritate skin, even mildly. Check the kit’s manual for which steps call for them.
- Aprons or lab coats keep clothing clean and, more importantly, keep loose fabric away from flames or spills.
A Safety Data Sheet, or SDS, is the document that tells you exactly what you’re working with. It lists hazard pictograms, a signal word (Danger or Warning), first-aid steps, and storage requirements for each substance in a kit. Quality kit manuals fold this information directly into their instructions, noting flammability warnings for something like denatured alcohol or specifying safe handling for sharp tools included in a set, according to documentation from Home Science Tools.
Watch for warning signs before you buy: a missing contents list, reagent amounts that aren’t specified, vague or absent age guidance, or no mention of adult supervision anywhere on the box. Any one of those gaps should make you pause.
What ISO 8124-10 and CPSC Guidance Actually Require
Manufacturers selling chemistry-style experiment sets are expected to follow ISO 8124-10, a standard covering chemistry sets, crystal-growing kits, and carbon-dioxide-generating sets. The standard caps how much of a given substance and at what concentration a kit can include, and it requires eye protection, a full contents list, clear instructions, and age guidance on the packaging.
The Consumer Product Safety Commission frames the issue differently but arrives at a similar place. Its guidance centers on “foreseeable misuse,” meaning a kit has to be designed with the assumption that kids won’t always follow the steps exactly.
Safety professionals recommend choosing kits compliant with updated standards precisely because those standards force manufacturers to think through what happens when a child adds too much of something, skips a step, or improvises. Standards-driven design catches problems that instructions alone cannot.
A label reading “meets ISO 8124-10” is a meaningful signal, but it’s not the whole picture. Check for three things together:
- The standard is named specifically, not just “meets safety standards.”
- An SDS or safety summary is included or easily found.
- Supervision instructions are specific, not a generic “adult supervision recommended” sticker.
Matching Experiments to Your Child’s Age
Age-appropriateness isn’t just a marketing label. It reflects real differences in motor control, impulse control, and the ability to follow multi-step directions safely.
- Ages 5 to 7: Kids in this range should observe, ask questions, and follow simple one-step directions while an adult handles anything involving heat, sharp tools, or precise measuring. Their job is curiosity, not execution.
- Ages 8 to 10: Children can measure ingredients and handle basic transfers under direct supervision, but an adult should still manage any step involving flame, sharp edges, or concentrated reagents.
- Ages 11 to 13: Kids can typically manage more advanced measurement and use simple tools with an adult nearby rather than hands-on, provided they’ve shown they can follow written steps without skipping ahead.
Before starting any activity, ask yourself two quick questions: can this child follow a sequence of steps without losing track, and have they shown they won’t taste or touch materials out of curiosity? If the answer to either is no, scale the activity down or take over the risky steps yourself. For group settings, keep the adult-to-child ratio tight enough that no single supervising adult is watching more than a handful of active workstations at once.
Building a Safe Experiment Space at Home or in Class
Pick a flat, ventilated surface near a sink, and clear away anything you don’t need for the activity. A kitchen table works fine, but paper towels and a shallow tray or baking sheet should be within arm’s reach before you start. Classroom guidance from Diy recommends this exact setup: a contained surface, labeled materials, and a clear spot for cleanup.
Pre-measure reagents for younger children rather than handing them a full container and a measuring spoon. This single habit eliminates a huge share of “too much of one thing” mishaps. Use plastic or borosilicate glass containers appropriate to the activity, and never seal a fizzy or gas-producing reaction inside a closed container. Pressure builds fast, and a sealed lid turns a fun geyser experiment into a projectile hazard.
- Keep the workspace clear of unrelated clutter and food items.
- Pre-measure anything a child under 10 will be handling.
- Skip experiments calling for flammable solvents or fragile glass when supervising a large group.
- Choose food-grade or lower-concentration substitutes when a recipe allows it.
Pro Tip: Run every new experiment yourself once, without your child present, before doing it together. You’ll catch surprises (a stronger fizz than expected, a stickier residue) before they become a stressful live-demo moment.
Handling Accidents, Storage, and Leftover Materials
Mishaps happen even with good preparation, so know the response before you need it. If a substance gets in the eyes, rinse continuously for 15 minutes with clean water. For skin contact, remove contaminated clothing and rinse the area thoroughly. If a child swallows something concerning, call Poison Control at 1-800-222-1222 immediately. Call 911 for any difficulty breathing, significant burns, or loss of consciousness.
Between activities, store chemicals in their original labeled containers whenever possible, and keep oxidizers separated from organic materials. Anything within a child’s reach should have a childproof latch if the contents pose any risk. Small amounts of low-hazard leftover reagents can usually be diluted and rinsed down the drain, but always check the specific SDS and your local disposal rules first, since guidance varies by substance.
- Rinse eyes for a full 15 minutes for any splash.
- Keep the Poison Control number posted somewhere visible in your kitchen or classroom.
- Store reactive materials separately and label everything.
- Confirm disposal steps against the kit’s own SDS rather than guessing.
How Thoughtful Kit Design Cuts Down on Risk
The safest experiment isn’t the one with the fewest interesting reactions. It’s the one where the design itself keeps kids from getting hurt even when they don’t follow every instruction perfectly. That’s the thinking behind how some makers build their kits.
- Clear age guidance printed on every kit, not buried in fine print.
- Included PPE, so families aren’t scrambling to find goggles separately.
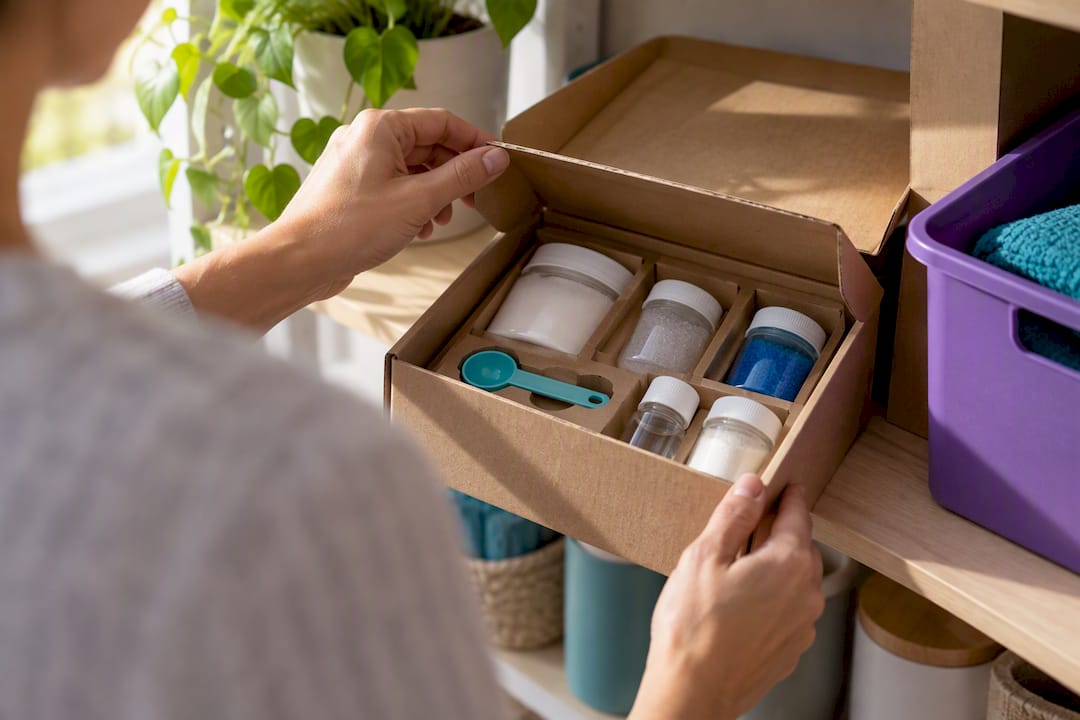
- Pre-measured reagent vials that remove the guesswork younger kids shouldn’t be doing alone.
- Role-play framing (lab coats, badges) that naturally pulls an adult into the activity as a partner, not just a supervisor standing off to the side.
- Lesson plans that build safety steps into the story of the experiment itself.
The proprietary E³ Method, short for Engage, Encourage, Empower, structures this even further. It assigns predictable roles between adult and child at each stage of an experiment, so supervision isn’t an afterthought bolted onto instructions. It’s part of the design from the first step.
A Perspective on Supervised Risk and Real Learning
No hands-on experiment is zero risk, and pretending otherwise does families a disservice. What matters is supervised risk taken deliberately, where a child learns to measure carefully, respect a warning label, and ask before touching something unfamiliar. That’s a real skill, not a formality.
Verify labels every time, even on a kit you’ve used before. Try one new experiment at a time rather than a full afternoon of unfamiliar reactions, and debrief afterward: what worked, what felt tricky, what you’d do differently. Reach out to your kit’s publisher if you need help adapting an activity for your classroom or your child’s specific needs.
— Tita
Choosing Kits That Take Safety as Seriously as You Do
Some companies build hands-on, screen-free STEAM kits for kids ages 5 to 13 with safety baked into the design rather than as an afterthought. Approaches like the E³ Method structure adult and child roles clearly, so supervision happens naturally instead of becoming a separate checklist you have to remember.

Start by picking a kit that matches your child’s age band and comfort level. The Shocking Electric Science S.T.E.M. Experiment Kit is a good example of controlled design for kids exploring electricity for the first time, with built-in guardrails rather than raw components. If you’re supporting a child who learns differently, resources on sensory play and development can help you adapt any kit further. When you’re ready to browse a full range of age-appropriate options, visit the Teamgeniussquad shop and pick the kit that fits your child’s next step in confident, hands-on discovery.
Where to Verify Kit Safety Claims Yourself
- ISO 8124-10 for the full technical standard on chemistry experiment sets.
- CPSC business guidance for how “foreseeable misuse” shapes safer design.
- Labsafety of inconsistent oversight across the science kit industry.
- Poison Control: 1-800-222-1222, for any ingestion concern, day or night.
Sources
- CPSC business education FAQ (toy safety guidance)
- Are Today’s Science Kits Safer? Let’s Talk About the Fallout
FAQ
What Safety Precautions Should You Take With Science Kits?
Always wear goggles for any splash-risk activity, read the kit’s contents list and any included safety information before starting, and match the experiment to your child’s age and skill level. Set up on a flat, ventilated surface near a sink with a tray to catch spills, and keep an adult in charge of any step involving heat or concentrated reagents.
What Are the Basic Safety Rules for a Home or Classroom Lab?
Wear eye protection, keep the workspace clear and contained, never taste or smell reagents directly, pre-measure ingredients for younger children, and always have an adult supervise steps involving flame or sharp tools. Following ISO 8124-10 guidance on labeled contents and age guidance gives you a strong starting checklist.
What Age Is Appropriate for Starting Science Kits?
Most well-designed kits work for children as young as five, provided the activity matches their motor and cognitive skills: ages 5 to 7 should observe while adults handle hazardous steps, ages 8 to 10 can measure and transfer under supervision, and ages 11 to 13 can manage more advanced tasks with an adult nearby. Many experiment kits are designed for children approximately ages 5 to 13.
What Safety Gear Should Every Science Kit Include?
Goggles, gloves for skin-reactive reagents, and an apron or lab coat cover the core protection needs for most kit activities. A kit should also include or point to a Safety Data Sheet covering first-aid steps, storage guidance, and hazard information for anything supplied inside it.
How Much Do Teamgeniussquad’s Kits Cost?
Current pricing for Teamgeniussquad’s experiment kits, lab coats, and accessories is listed on the shop’s product pages, since prices vary by kit and bundle. The Meet Ava interactive STEM experiences start at $50 for a 30-minute one-on-one virtual session.


Leave a comment
This site is protected by hCaptcha and the hCaptcha Privacy Policy and Terms of Service apply.