STEM Rubric for Elementary: A 4-Level Scoring Guide
A good elementary STEM rubric scores what a child noticed, designed, tested and can explain, not how pretty the finished model looks. The version below uses four levels and six criteria, and it works for engineering challenges, science experiments and project-based units in grades K-5. Copy the table, trim it to the two or three rows your activity really assesses, and share it with students before they start.
TL;DR
- Score the thinking process (questions, tests, revisions, explanations), not the polish of the final build.
- Use four levels with concrete evidence examples. A short rubric that two adults score alike beats a long checklist.
- Pick only the criteria the task actually assesses, and revisit the rest on other projects during the year.
- For ages 5-8, accept drawings, models, demonstrations and spoken explanations. Add labeled diagrams, tables and simple graphs as children grow.
- Treat a score as information for the next lesson, never as a label on a child.
Table of Contents
- What an elementary STEM rubric should measure
- The rubric: six criteria, four levels
- Adapting the rubric for science experiments and engineering challenges
- Grade-band adjustments
- How to use the rubric before, during and after the activity
- Score fewer rows, more reliably
- A worked example: the paper bridge challenge
- Our perspective: confidence is part of the evidence
- Hands-on materials that make the rubric easy to use
- Common mistakes to avoid
- FAQ
- Sources
What an elementary STEM rubric should measure
A rubric is a scoring guide for observable performance. In elementary science and engineering, that performance is what students do and say while they work. The NGSS elementary standards describe expectations for kindergarten through fifth grade in terms of what students should know and be able to do, built from science and engineering practices, disciplinary core ideas and crosscutting concepts.
That has a practical consequence. NGSS guidance on instructional materials points toward tasks that ask students to use several dimensions together instead of reciting isolated vocabulary. So the question for a hands-on, screen-free activity is not “Did the bridge look neat?” It is:
- What did the child notice or define as the problem?
- What did they design or predict, and why?
- What did they test, and what happened?
- What can they explain, and what would they change?
If your rubric rows map to those four questions, you are already close to what standards-based assessment asks for.
The rubric: six criteria, four levels
Level 4 is “Excelling,” 3 is “Meeting,” 2 is “Approaching,” 1 is “Beginning.” Descriptors are written so a child could read them.
| Criterion | 4: Excelling | 3: Meeting | 2: Approaching | 1: Beginning |
|---|---|---|---|---|
| Asking and defining | Names the problem or question in their own words and says who or what it is for | States a clear problem or question | Question is vague or borrowed from the teacher with help | Needs the problem restated to begin |
| Planning and designing | Sketch or plan shows labeled parts and a reason for each choice | Sketch or plan shows the main parts and one reason | Sketch is present but parts or reasons are missing | No plan before building or testing |
| Testing and trials | Tests more than once, changes one thing at a time, records each result | Tests at least twice and records results | Tests once and describes what happened | Builds or mixes without a test |
| Evidence and data | Uses measurements, tallies or a simple graph to compare results | Records observations or counts in a table or list | Records a few loose observations | Little or no record |
| Explaining and concluding | Uses evidence to explain why it worked or failed and proposes a specific improvement | Explains the result and links it to what was tested | Describes what happened without a reason | Gives an opinion only (“it was cool”) |
| Working together and persisting | Shares tools and ideas, listens to others, tries again after a failed test | Contributes and takes turns, tries again with a nudge | Works mostly alone or needs reminders to share | Stops after the first problem |
A few notes on why it is built this way.
Four levels, not ten. The REL Northeast and Islands validation tool asks reviewers to check that descriptors align with standards, emphasize demonstrated strengths, offer enough meaningful levels, and are likely to produce similar scores from different raters. Four levels with concrete evidence is enough to separate performance without inviting guesswork.
Anchored in evidence, not adjectives. “Excellent” and “good” mean different things to different adults. “Tests at least twice and records results” does not.
No row for neatness. The same guidance cautions against over-weighting format, spelling, legibility or arbitrary quantities. A child with dysgraphia who explains a flawless test aloud should earn a 4 in “Explaining,” and that is exactly what this rubric allows.
Adapting the rubric for science experiments and engineering challenges
The same rows work for both, but the vocabulary shifts.
Science experiments
Replace “Asking and defining” with “Asking a testable question,” and add a prediction to the planning row. A Level 3 child might write or say, “I think the warm water will dissolve the sugar faster because it moves more.” Level 4 adds what stayed the same in each cup so the test was fair.
Engineering design challenges
Hypothesis language does not fit a build-and-test task. Use an engineering sequence instead: identify a need, brainstorm, choose and design a solution, build a prototype, test and evaluate, then communicate. The Brookhaven National Laboratory elementary science fair judging criteria follow this logic, scoring originality, problem definition, design solutions, trials, documentation, data analysis, conclusion and applications on four performance levels. Its top level for the trials criterion expects three or more experiment trials or prototype tests, with fewer trials scoring lower. You do not have to copy that number, but it shows how a concrete trial count can anchor a level.

For design challenges, I like adding one question to the conversation: “What would you change on your second version?” A child who answers that has shown iteration, which is the heart of engineering.
Grade-band adjustments
No national source sets one age cutoff for what evidence to expect, so treat the following as a starting point and adjust for your students’ language access, disability supports and the practice you are assessing.
| Grade band | Evidence that counts |
|---|---|
| K-2 | Drawings, physical models, demonstrations, oral explanations, photos, teacher-scribed notes, short writing |
| 3-5 | Labeled diagrams, organized tables, measurements, simple graphs, written conclusions that cite evidence |
This progression follows the NGSS K-2 emphasis on sketches and models. For example, the performance expectation K-2-ETS1-2 asks students to develop a simple sketch, drawing or physical model showing how an object’s shape helps it function. The K-2 engineering expectations also include defining a simple problem and comparing the strengths and weaknesses of designs, so a first grader’s rubric should reward exactly those moves.
For older students, shift gradually. A fourth grader can be asked for a table of three test results and a sentence beginning “My evidence is…” without losing the creativity that made the project fun.
How to use the rubric before, during and after the activity
Before: share the success criteria
Show students the rubric in plain words and ask them to restate two rows in their own language. Children work better when the target is visible. Read it aloud for early readers, and add icons (a pencil for planning, a magnifying glass for testing, a speech bubble for explaining).
During: collect evidence while they work
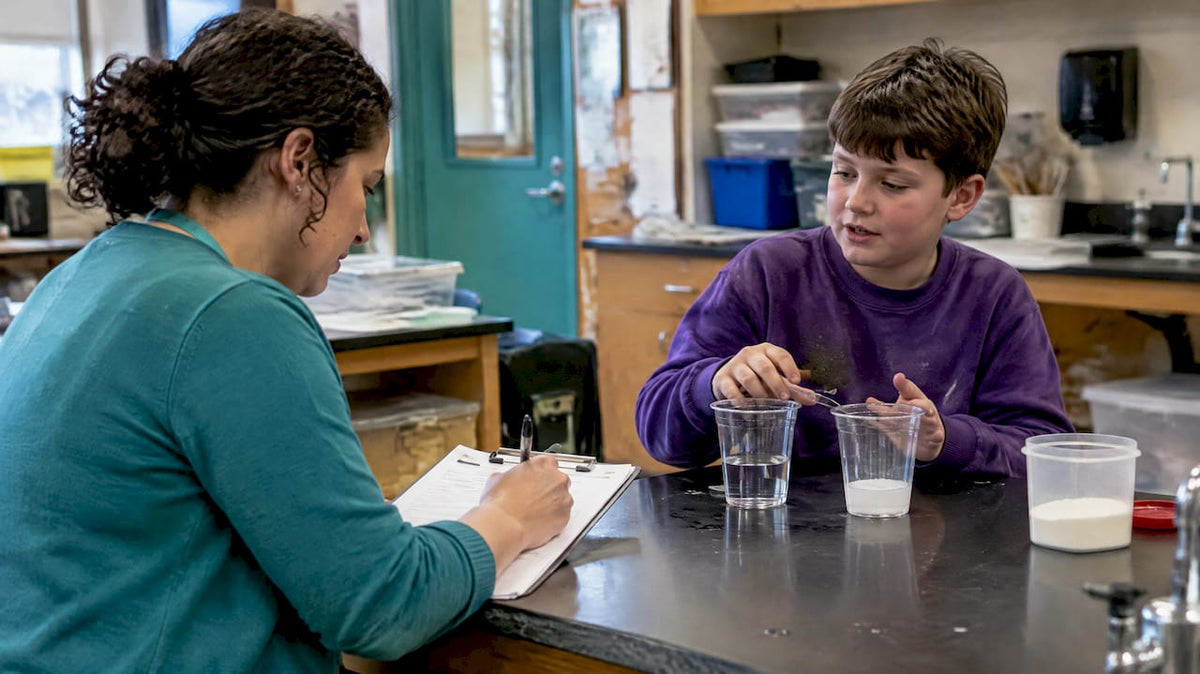
The rubric is most useful when you are circulating, not when you are grading at night. The Institute of Education Sciences describes a problem-based elementary approach in which students collaborate around authentic engineering scenarios, research, build prototypes, present solutions and answer teacher questions. The lesson for scoring is that discussion and iteration are part of the evidence. Keep a clipboard with sticky notes, jot a child’s exact words, and snap a photo of the test setup.
Useful prompts:
- “What problem are you solving?”
- “How will you know if it worked?”
- “What happened the first time, and what did you change?”
After: give feedback and allow revision
Give one specific strength and one next step per child, then let them revise. The Virginia Department of Education explains that performance assessment can reveal mastery, misconceptions and learning gaps, so evidence should guide what you teach next. A “2” in Testing and trials is a note to plan a lesson on fair tests, not a verdict about the child.
Score fewer rows, more reliably
Do not force every row into every activity. Virginia’s guidance recommends choosing only the scientific or engineering practices a particular performance assessment addresses, then giving students multiple opportunities across the year to show the rest. A 20-minute mixing experiment might only need “Testing” and “Explaining.” A week-long bridge challenge can use all six.
To keep scoring consistent between adults, build anchor examples:
- After the first project, pick one student sample per level for each row you used (with names removed).
- Have two adults score five samples independently.
- Compare, talk about each disagreement, and rewrite any descriptor that caused one.
The REL validation tool describes a 60-90 minute review process for checking alignment, clarity, scoring criteria, inter-rater reliability and feedback. You do not need a formal review, but even 30 minutes with a colleague makes a classroom rubric noticeably fairer.
A worked example: the paper bridge challenge
The challenge: build a bridge from paper and tape that spans a 10-inch gap and holds as many pennies as possible.
- Maya (grade 2) draws a flat strip, then a folded accordion strip. She tests both, and says, “The folded one held more because it is stiffer.” She cannot write the sentence, so her teacher scribes it. She scores a 3 in Testing, a 3 in Explaining and a 3 in Planning. Her handwriting never enters the score.
- Jon (grade 4) records pennies held in a table across three designs, graphs them as bars, and proposes adding a second fold. He scores a 4 in Evidence and a 4 in Explaining.
- Leo (grade 3) builds one bridge, it collapses, and he says, “It broke.” He scores a 2 in Explaining and a 1 in Persisting. The next-step feedback: “Try again and change one thing. Tell me which one.”
Leo’s score is a plan for tomorrow, and that is the right way to read it.
Our perspective: confidence is part of the evidence
We built Team Genius Squad around a real family journey with dyslexia and dysgraphia, and it changed how we think about scoring. A child who struggles to write a lab report may still understand exactly why the ramp was too steep. If the rubric only sees the report, the child learns that science is not for them. If it sees the spoken explanation, the sketch and the third attempt, the child learns the opposite.

So when we design experiment kits for ages 5-13, we think in our E³ Method terms: engage curiosity, encourage effort and reflection, and empower the child to see themselves as a scientist. A rubric can serve the same arc. Share it up front so children know what a good scientist does, celebrate the moment a test fails and the child tries again, and let them show their thinking in more than one way.
One practical habit: add a “What I’m proud of” line at the bottom that the child fills in (or says aloud) before you add any score. It costs thirty seconds and tells you things no row will.
— Tita
Hands-on materials that make the rubric easy to use
A rubric works best when the activity gives children something real to test. Our experiment kits are screen-free and designed for ages 5-13, so children conduct real experiments and can describe what they saw, which gives you rich evidence for the Testing and Explaining rows. If your students love a build-and-test format, the Shocking Electric Science kit and the Solar Energy kit with mirror disk are two places to start. For a live session, our 30-minute 1-on-1 Zoom experiment with Ava the STEM Ambassador is 50 USD one-off, and you can use this rubric to capture what each child asks and explains.
Looking for more activities to score? Our guides to STEM design challenges with measurable tests, NGSS-aligned activities you can run this week and bridge building challenges pair well with the table above. Parents who want a simpler at-home version can start with the practical STEM checklist for ages 5-13.
Common mistakes to avoid
- Grading the craft. Glitter does not show understanding. Score the reasoning behind the design.
- Using every row every time. It overloads you and the child.
- Hiding the rubric. Criteria shared only after the project cannot guide the work.
- Requiring writing for all evidence. Offer drawing, talking, modeling and photos.
- Treating a score as permanent. Allow revision, and record growth across the year.
FAQ
What is the best STEM rubric for elementary students?
The best one is short, aligned to the practices your task actually assesses, and written with concrete evidence at each level. Four levels and three to six rows is a good range. The table above is a starting point you can trim for a given activity.
Can I use the same rubric for a STEM project and a science experiment?
Yes, with small wording changes. For experiments, ask for a testable question and a prediction. For engineering projects, ask for a defined problem, a design, and tests of a prototype. The testing, evidence and explaining rows stay the same.
How do I score young children who cannot write much yet?
Accept drawings, models, demonstrations and oral explanations, and scribe what they say. NGSS expectations for grades K-2 emphasize sketches and models, so these are standards-aligned evidence, not shortcuts.
Should every STEM activity be graded?
No. Many activities work best as formative practice, where you give feedback and let students revise. Reserve scoring for tasks where you have shared the criteria in advance and students have had a chance to improve.
Sources
- Elementary Standards, NGSS K-5
- K-2-ETS1-2 Engineering Design, NGSS
- Critical Features of Instructional Materials Design for Today’s Science Standards
- Performance Assessment Quality and Validation Tool, REL Northeast and Islands
- Elementary Science Fair Judging Criteria, Brookhaven National Laboratory
- Study 93445, What Works Clearinghouse
- Assessment Resources, Virginia Department of Education


Leave a comment
This site is protected by hCaptcha and the hCaptcha Privacy Policy and Terms of Service apply.