
5 Bridge Building Challenges for Teachers, Ages 5–13, Tested Activities
This page gives you ready-to-run bridge building for kids activities, graded for ages 5 to 13, using paper, popsicle sticks, spaghetti, and LEGO bricks. Each challenge includes materials, build steps, and a testing protocol so kids measure real results instead of guessing. You’ll also find safety notes and a scaffolded kit option from Teamgeniussquad for classrooms or families who want the prep done for them.
TL;DR:
- Using simple household materials like paper, popsicle sticks, spaghetti, and LEGO bricks can effectively teach structural engineering concepts to kids aged 5 to 13.
- Proper preparation, such as pre-cutting materials and organizing supplies by activity type, saves time and reduces chaos during sessions.
- Testing results become meaningful when load is added gradually and conditions are standardized, with record-keeping emphasizing failure points and efficiency.
- Reinforcing joints and adding lateral supports are common fixes for weak or twisting bridges, while design flaws often stem from support irregularities or unsupported spans.
- Focusing on documentation and redesign cycles enhances learning, showing that repeated attempts and explanations are more valuable than just the strongest or most aesthetic final build.
Table of Contents
- Materials and Quick Starter Kit
- Five Bridge Challenges, From Beginner to Advanced
- How to Test Bridges and Record Reliable Results
- Teaching Tips and Learning Goals by Age
- Variations, Competitions, and Cross-Curricular Extensions
- How Teamgeniussquad Builds on This With the E³ Method
- Common Bridge Problems and How to Fix Them
- Four Bridge Types Kids Actually Recognize
- What Actually Matters in a Bridge Challenge
- Ready-to-Use Kits and Lesson Plans From Teamgeniussquad
- Sources
Materials and Quick Starter Kit
You don’t need a hardware store run to get started. Most bridge-building for kids sessions use materials already sitting in a kitchen drawer or a classroom supply closet, and minimal supplies like paper, cardboard, popsicle sticks, tape, string, and dry spaghetti are genuinely enough to teach real structural engineering concepts.
Group your supplies by activity type so setup takes minutes, not an hour:
- Paper challenges: printer paper, index cards, cardstock, masking tape
- Stick and wood builds: popsicle sticks, wood glue, clothespins for clamping
- Pasta builds: spaghetti or fettuccine, hot glue (adult-supervised) or white glue
- Building bricks: any interlocking brick set, sorted by size beforehand
- Testing weights: pennies, dried beans in small bags, classroom weight sets
Short on a specific item? Coins work in place of a calibrated weight set, dried rice or beans substitute for sand bags, and a stack of paperback books stands in for graduated test weights. Watch small parts around younger kids, and keep hot glue guns strictly in adult hands.
Before the session starts, run through a quick checklist: how many minutes per station (aim for 15 to 20 for younger groups, 30 to 45 for older ones), what you’ll use to measure span and load, and how you’ll split kids into pairs or trios so nobody is stuck waiting for a turn.
Pro Tip: Pre-cut your spaghetti and pre-cut paper strips the night before a classroom session. Ten extra minutes of prep saves twenty minutes of chaos once 25 kids are all reaching for the same scissors.
For a done-for-you version of this list, Teamgeniussquad’s practical STEM checklist for kids aged 5 to 13 breaks prep down station by station.
Five Bridge Challenges, From Beginner to Advanced
Each of these builds targets a different age band and a different structural concept. Run them in order across a semester, or pick the one that matches the group in front of you right now.
1. Paper Bridge Challenge (ages 5 to 8)
Give each child one sheet of standard paper and a short strip of tape. The goal: span an 8 to 10 inch gap between two books or blocks and hold as much weight as possible without touching the table in between.
Build steps: Fold the paper into an accordion, a tube, or a triangular channel instead of leaving it flat. Test: Place pennies one at a time in the center of the span and count until it collapses. Official paper-bridge rules from Illinois 4-H’s Bridge Building Challenge set a target of 100 pennies, roughly 9.25 ounces, on a single 8.5x11 sheet.
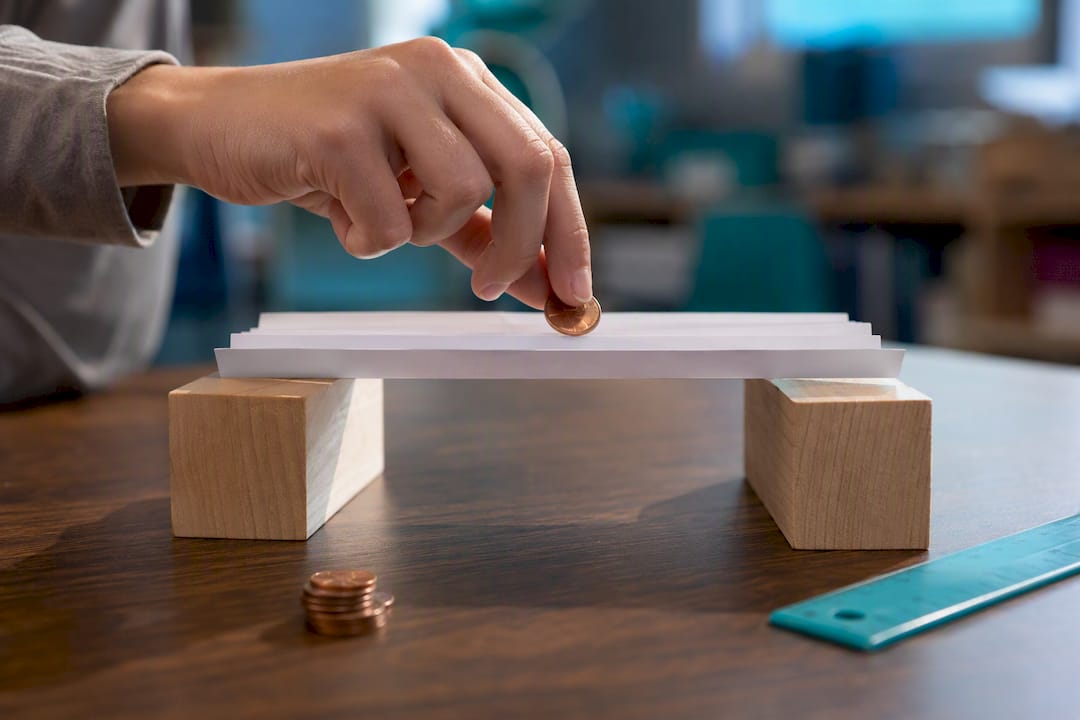
A flat sheet of paper folds under almost no weight at all. Fold that same sheet into a triangular channel or accordion pleats, and it can suddenly hold dozens of pennies it couldn’t support before. That jump is the whole lesson: shape, not material, is often what makes something strong.
2. Popsicle Stick Bridge (ages 8 to 10)
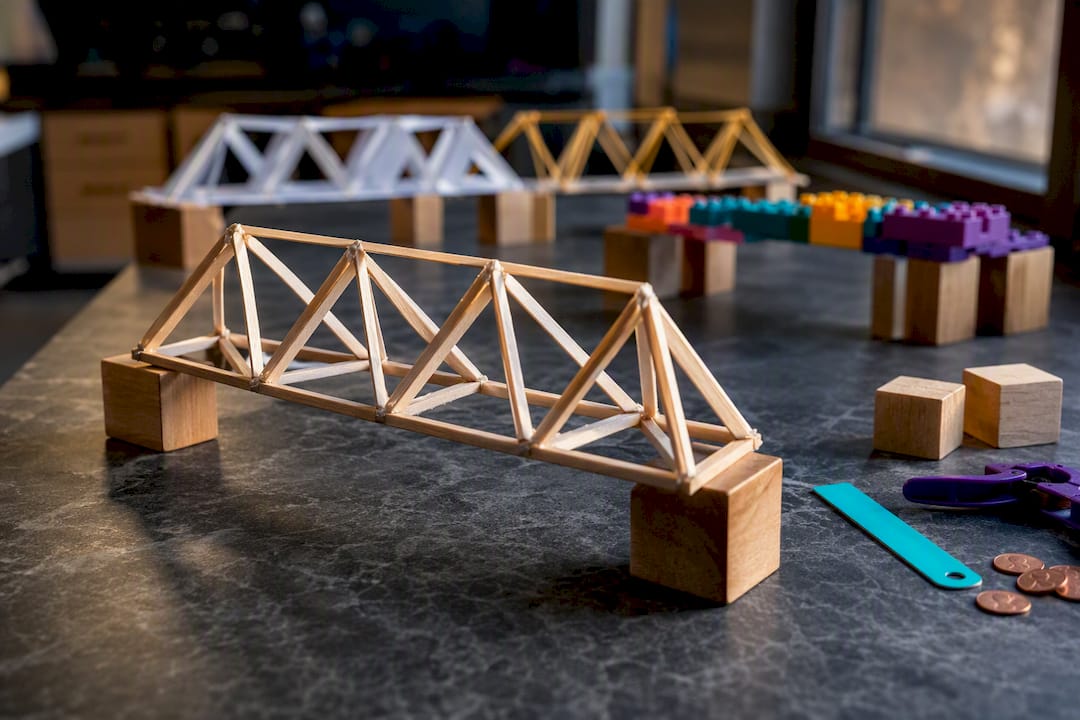
This is where triangles enter the conversation. Kids build a truss, a rigid framework of triangular shapes, using popsicle sticks and glue, spanning roughly 10 inches between two supports.
Build steps: Glue sticks into triangle units first, then connect triangles into a longer truss rather than gluing one long flat plank. Clothespins work well as clamps while glue sets. Test: Rest the finished bridge between two stacks of books of equal height, then add classroom weights or stacked textbooks to the center until it fails.
3. Spaghetti Bridge Challenge (ages 9 to 11)
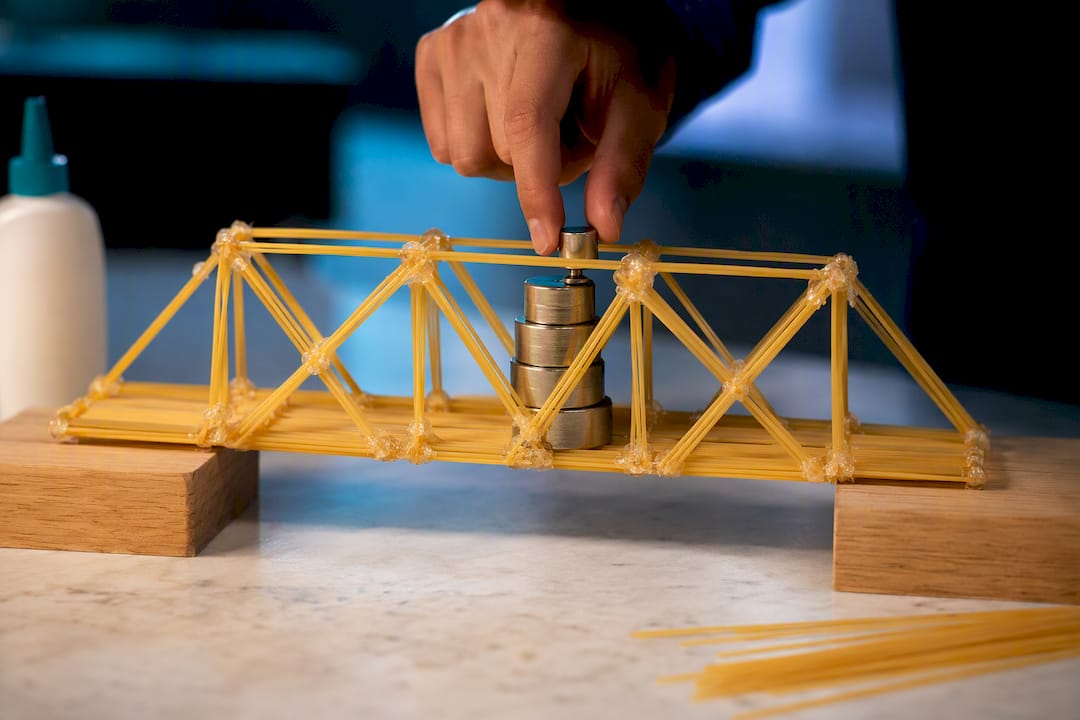
Spaghetti bridges force kids to think in terms of small, weak members working together. Give each team roughly 15 to 20 strands of spaghetti, a small bottle of glue, and a strict time limit of 45 to 60 minutes.
Build steps: Bundle several strands together for compression members, and cross strands diagonally for tension. Reinforce joints where strands meet since that’s almost always where a spaghetti truss snaps first. If a hot glue gun is in use, an adult should handle it at all times. Test: Add weight gradually in small increments rather than dropping a heavy load all at once, and note exactly where the first crack appears.
4. LEGO or Building Brick Bridge (ages 10 to 12)
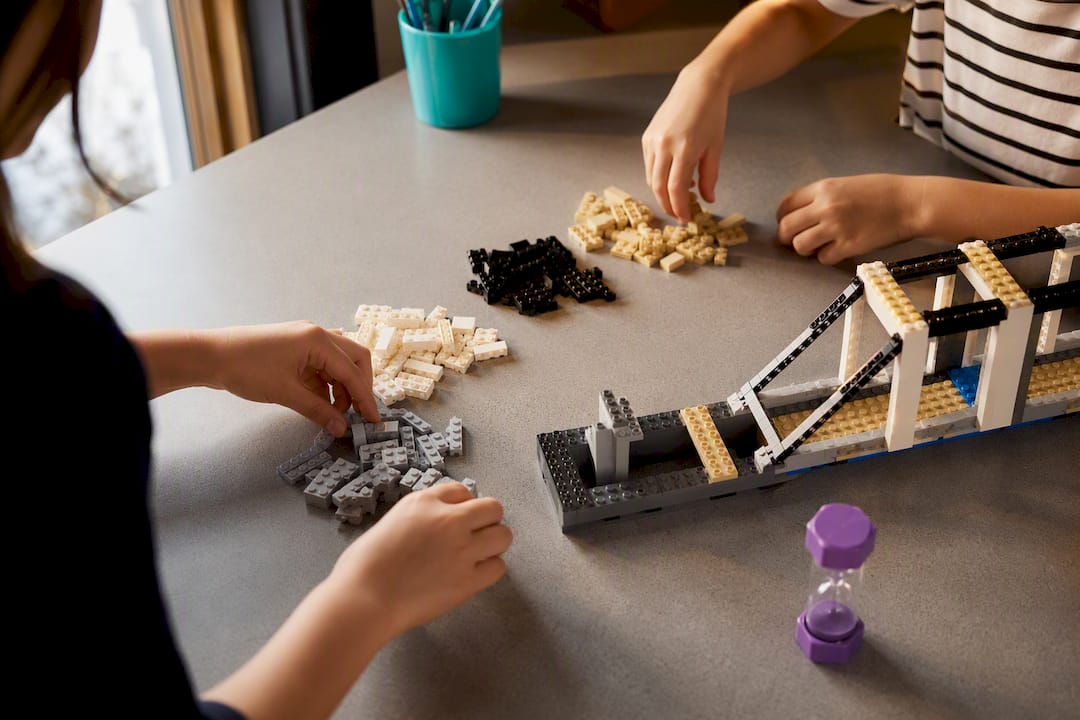
Interlocking bricks let kids compare designs quickly since nothing needs to dry or cure. Set up three difficulty levels: an 8 inch span for a first attempt, 12 inches for round two, and 16 inches for the advanced version.
Build steps: Overlap and stagger every seam. A bridge built from two solid brick towers with a single row of connector bricks across the top will flex and pop apart under load, while staggered, interlocking joints distribute stress across the whole structure instead of concentrating it at one weak seam. Test: Run all three spans back to back and have kids graph how load capacity drops as span length increases. That’s real data collection, not just a fun build.
5. Creative Mixed-Material Challenge (ages 11 to 13)
This one has no set materials list. Give teams a mixed bin of paper, sticks, string, and a small amount of tape, then set a single rule: document every design decision in a build journal before testing.
The focus shifts from “does it hold weight” to “why did version two hold more than version one.” Kids who iterate through two or three redesigns and can explain what changed are doing the real work of an engineer, whether or not their final bridge wins any strength contest.
How to Test Bridges and Record Reliable Results
A bridge test only means something if it’s fair. Standardize the span distance for every team in a given round, fix both supports so they can’t slide apart under load, and keep the test surface flat and level.
Safety comes first once weight starts going on. Keep faces and hands clear of the span while testing, cap the height of any elevated test setup to something a chair or low table provides (never a precarious stack), and have an adult supervise every load test, especially with younger groups.
Add load in small, even increments rather than all at once:
- Start with a light known weight (five pennies, one small weight)
- Add the same increment every 10 to 15 seconds
- Stop the instant you see buckling, cracking, or a support sliding
- Record the load at first sign of failure, not just total collapse
Recording results turns the activity into an actual experiment. A simple table works for any age group:
| Team | Materials | Span (in) | Max load held | Failure point observed |
|---|---|---|---|---|
| Team A | Paper, tape | 8 | dozens of pennies | Center crease folded |
| Team B | Popsicle sticks | 10 | 4 lb | Joint at midpoint cracked |
| Team C | Spaghetti | 9 | 100 pennies, roughly 9.25 ounces | Diagonal strand snapped |
For kids 11 and up, introduce a simple efficiency measure: divide the max load held by the bridge’s own weight. Two bridges that hold the same load aren’t equally good if one weighs three times as much. That single calculation quietly teaches a concept engineers use every day, structural efficiency, without ever using the word “engineering” out loud.
Teaching Tips and Learning Goals by Age
What a child gets out of bridge building for kids depends heavily on where they are developmentally, so match your questions and expectations to the age in the room.
- K to 2: Focus on observation. Ask “which shape looks the strongest to you?” before testing, then let the result confirm or surprise them.
- Grades 3 to 5: Introduce the words tension (pulling apart) and compression (pushing together) explicitly, and point to where each happens in their own build.
- Grades 6 to 8: Push toward structure and efficiency. Ask why triangles show up in every strong design they’ve seen.
- Grades 9 to 13: Bring in data. Have them graph load versus span, or calculate the efficiency ratio described above.
Good facilitation questions work at every level: “What happened right before it broke?” “If you had one more piece of tape, where would you put it?” An exit-ticket prompt like “Draw the exact spot your bridge failed and label why” gives you a fast, honest read on whether the concept landed.
Pro Tip: When a bridge collapses, resist the urge to jump in and fix it for them. Letting kids sit with the failure and figure out the next move themselves builds far stronger problem-solving skills than a teacher-supplied fix ever will.
Treat every collapse as data, not defeat. The language you use matters here: “that gave us information” lands very differently than “that didn’t work.”
Variations, Competitions, and Cross-Curricular Extensions
Once the basic build is done, you have several easy ways to stretch the activity into something bigger.
- Run a competition format. Try strongest-for-weight (raw load capacity), lightest-strongest (best ratio of load to bridge weight), or best-documented-redesign (judged on the build journal, not just the test result).
- Add a math extension. Have kids chart every team’s results on a bar graph and calculate class averages by material type.
- Add a literacy extension. Require a short design journal entry after every test: what changed, what they predicted, what actually happened.
- Add an art extension. Once the engineering test is done, let kids decorate or theme their bridge and explain how the aesthetic choice did or didn’t affect strength.
- Run a materials comparison. Build the same design in paper, cardstock, and foil, then test all three for a clean, repeatable experiment on how material choice alone changes the result.
Pair any of these with the team building experiments format if you want defined roles (builder, tester, recorder) rather than an open free-for-all.
How Teamgeniussquad Builds on This With the E³ Method
Teamgeniussquad’s kits take everything above and add a layer of identity and confidence-building on top. The trademarked E³ Method, Engage, Encourage, Empower, guides kids from a first curious look at a challenge toward genuinely believing they can solve it.
A lab coat and a “junior engineer” badge sound small, but role-play elements like these change how a hesitant kid shows up to a build table. That matters especially for neurodivergent learners, since Teamgeniussquad’s approach grew out of a real family’s experience with dyslexia and dysgraphia, and the kits are built to let kids show what they know without a heavy writing load standing in the way.
For a teacher juggling 25 kids and one prep period, a kit that arrives with materials sorted and instructions written removes the single biggest barrier to actually running the activity: time.
Common Bridge Problems and How to Fix Them
Almost every failed bridge fails for one of the same handful of reasons, and spotting the pattern is half the lesson.
The bridge sags in the middle before any weight is added. This usually means the span is too long for the material’s stiffness. Shorten the span, add a fold or truss shape down the center, or thicken the load-bearing member.
It holds weight but suddenly snaps at one joint. Joints, not the middle of a beam, are almost always the weakest point in a homemade bridge. Reinforce every connection point with extra glue, extra tape, or an overlapping brick instead of a single butt joint.
It twists sideways under load instead of just bending down. This is a classic sign of a bridge that’s strong in one direction but has no lateral bracing. Add diagonal supports underneath, connecting the two sides, and the twist usually disappears.
Two nearly identical designs give wildly different results. Check your testing setup before you blame the design. An uneven support height, a load placed off-center, or a slightly different span distance between trials will throw off results more than most material choices do.
It’s strong but heavier than every other team’s bridge. That’s not a failure, it’s a design tradeoff worth discussing directly. Ask the team what they’d cut if they had to rebuild it 20 percent lighter.
Four Bridge Types Kids Actually Recognize
Real-world bridges fall into a handful of families, and pointing them out on the drive to school makes the concepts click faster than any diagram.
A beam bridge is the simplest: a flat plank resting on two supports, like a board laid across a creek. It’s easy to build but sags under weight in the middle, which is exactly the problem the paper and popsicle stick challenges above are built to solve.
An arch bridge curves upward, pushing the load out and down into its supports instead of letting it sag in the middle. Roman aqueducts used this shape, and it’s why an arched paper strip almost always beats a flat one in testing.
A truss bridge is built from a repeating pattern of triangles, the same shape kids use in the popsicle stick and spaghetti challenges. Triangles don’t bend out of shape the way squares do, which is the entire reason engineers reach for them constantly.
A suspension bridge hangs the road from cables strung between tall towers, like the Golden Gate Bridge. It’s tough to model with classroom materials, but a simple version using string, two pencils as towers, and a strip of paper as the deck gives older kids a hands-on feel for how tension in the cables holds the whole structure up.
What Actually Matters in a Bridge Challenge
The conventional advice on bridge building for kids leans hard on the finished product: whose bridge held the most weight, whose looked the most impressive. That’s the wrong thing to optimize for, and the research on productive struggle backs this up. A kid who rebuilds a failed design twice and can explain why version two worked better has learned more than the kid whose first attempt happened to survive by luck.
What gets overlooked is documentation. Most classrooms skip the build journal because it feels like an add-on to the “real” activity, when it’s actually where the STEM thinking gets captured. A bridge that collapses with a clear note about why is more valuable, educationally, than one that holds by accident with no explanation.
If you’re running this at home or in a classroom, prioritize the redesign cycle over the first build. Budget time for at least one rebuild, and treat the first collapse as the actual starting point of the lesson, not an unfortunate detour from it.
— Tita
Ready-to-Use Kits and Lesson Plans From Teamgeniussquad
If you’d rather skip the supply run and the late-night prep, Teamgeniussquad packages this kind of hands-on building into kits that arrive sorted, labeled, and ready for a lab-coat-wearing junior engineer to dig into. That’s the real difference from piecing together your own materials list: no last-minute trip for glue or missing pieces, and a kit built from the ground up for kids who don’t thrive with a standard worksheet in front of them.

Teachers and caregivers who want the structure without the guesswork can grab:
- Downloadable, classroom-ready lesson plans built around hands-on STEM challenges
- STEM books and puzzles that pair reading and reflection with the build itself
- The Mini Fab Science Lab kit for a broader set of screen-free experiments beyond bridges
Head to the lesson plans page to see which package fits your group size and grab one before your next STEM session.
Sources
Every testing target and build technique in this piece traces back to a public, teacher-facing resource, and each one is worth bookmarking if you plan to run these challenges more than once.
- Bridges and structural engineering - build a bridge challenge (Carnegie Mellon University)
- Build the Best Paper Bridge (Science Buddies)
- IL 4‑H Bridge Building Challenge details (Illinois 4‑H)
Download the PDFs directly for printable rubrics and exact challenge specs before your next session.


Leave a comment
This site is protected by hCaptcha and the hCaptcha Privacy Policy and Terms of Service apply.