Make Them a Scientist: 30 Hands on Science at Home Projects for Parents
Yes. Dozens of simple, low-cost, hands-on science experiments using household materials can be done at home right now to build real STEAM skills and genuine confidence. This guide organizes activities by science category and age band, covers the safety and setup basics, and shows you how to turn a five-minute reaction into a lasting learning moment.
TL;DR:
- Most household science experiments can be safely done at home with common pantry staples like baking soda, vinegar, and food coloring, without special equipment.
- Engaging children with questions before, during, and after experiments promotes deeper understanding and helps develop scientific thinking and data collection skills.
- Experiments should be matched to a child’s age and attention span, ranging from quick sensory activities for preschoolers to more complex, measurable tests for teenagers.
- Using role-play tools like lab coats and badges can foster a science identity, especially for children who struggle in traditional classroom settings.
- Ready-made experiment kits with guided prompts can simplify setup, boost confidence, and turn any activity into a meaningful learning moment.
Table of Contents
- Hands-On Science at Home by Category and Age
- Setting Up a Low-Mess Home Science Station
- Turning an Experiment into a Real Learning Moment
- Matching the Experiment to the Kid, Not the Other Way Around
- The E³ Method in Action: From Curiosity to Confidence
- Why Identity-Driven Science Sticks
- Ready-Made Kits for When You Want the Prep Done For You
- Sources
Hands-On Science at Home by Category and Age
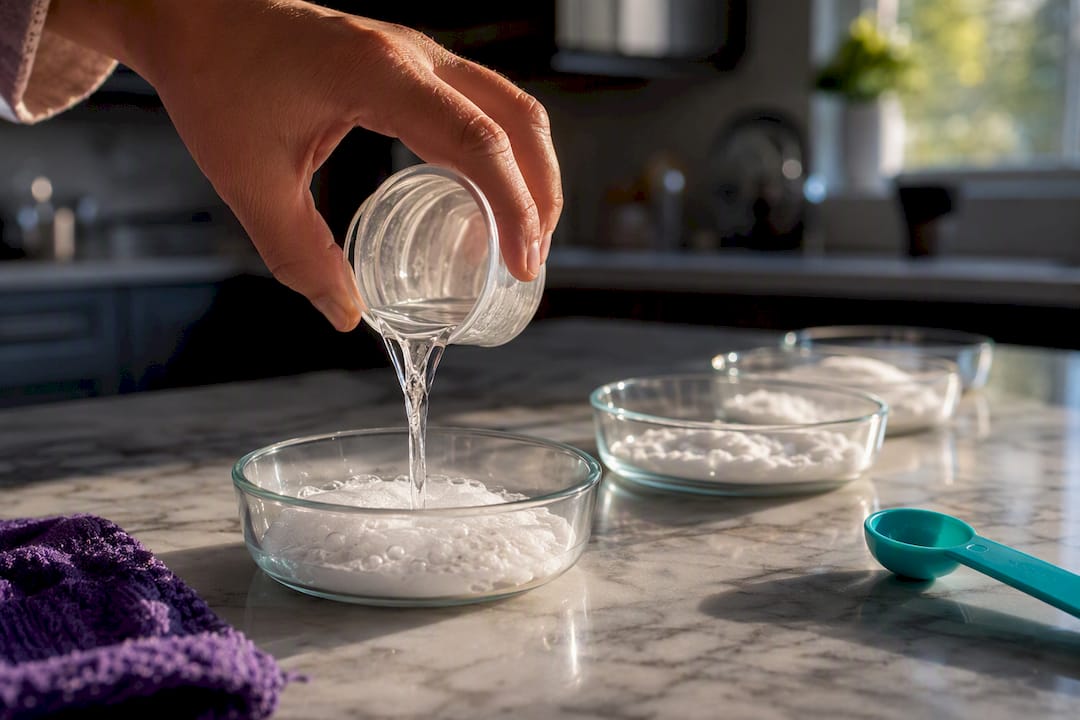
The best entry point into hands-on learning at home isn’t a fancy lab. It’s your kitchen counter, a handful of pantry staples, and a kid who wants to know why something fizzes. Nearly every beginner-friendly experiment leans on baking soda, vinegar, food coloring, and water, which means you can start today without a shopping trip.
Below is a curated set of activities grouped by discipline and age, each with a quick description, the materials you likely already own, roughly how long it takes, and the one skill it’s meant to build. Think of this as a starting menu, not a checklist you need to finish in a weekend.
Chemistry
- Baking soda and vinegar volcano (ages 3 to 8, about ten minutes): Build a paper-mache or clay cone, add baking soda, pour in vinegar. Materials: baking soda, vinegar, food coloring, tray. Goal: observe a chemical reaction producing gas.
- Elephant toothpaste (ages 8 to 13, about twenty minutes, adult-led): Yeast and hydrogen peroxide create a foaming eruption. Materials: hydrogen peroxide, dry yeast, dish soap, warm water. Goal: understand catalysts speeding up reactions. This one is a documented classroom favorite for a reason, ScienceBuddies has run stepwise versions for years.
- Milk plastic (casein) (ages 8 to 13, about thirty minutes): Curdle milk with vinegar to form moldable plastic. Materials: milk, vinegar, strainer. Goal: see a liquid transform into a solid polymer.
- Color-changing cabbage juice (ages 8 to 13, about twenty-five minutes): Boiled red cabbage water shifts color with acids and bases. Materials: red cabbage, baking soda, vinegar, lemon juice. Goal: introduce pH as a measurable property.
- Invisible ink with lemon juice (ages 5 to 8, about fifteen minutes): Write with lemon juice, reveal with heat. Materials: lemon juice, cotton swab, lamp or iron. Goal: observe how heat changes chemical compounds.
- Fizzy lemonade science (ages 3 to 5, about ten minutes): Mix baking soda into lemonade and watch it fizz. Materials: lemonade, baking soda. Goal: connect an everyday drink to acid-base chemistry.
- Homemade slime (ages 5 to 8, about twenty minutes): Combine glue, water, and a borax solution or contact-lens saline. Materials: white glue, water, saline solution, baking soda. Goal: explore polymers and viscosity.
Physics
- Balloon-powered car (ages 8 to 13, about thirty minutes): A balloon taped to a straw propels a small cardboard car. Materials: balloon, straw, bottle caps, cardboard. Goal: demonstrate Newton’s third law.
- Density tower (ages 5 to 13, about fifteen minutes): Layer honey, dish soap, water, and oil by density. Materials: honey, dish soap, water, vegetable oil, tall glass. Goal: visualize liquid density differences.
- Egg drop challenge (ages 8 to 13, about thirty minutes): Design padding to protect a raw egg dropped from height. Materials: egg, straws, cotton balls, tape. Goal: engineer for impact absorption.
- Static electricity balloon (ages 3 to 8, about ten minutes): Rub a balloon on hair, stick it to a wall. Materials: balloon. Goal: observe static charge attraction.
- Homemade catapult (ages 8 to 13, about twenty-five minutes): Popsicle sticks and rubber bands launch small pom-poms. Materials: popsicle sticks, rubber bands, spoon. Goal: explore stored energy and force.
- Sink or float sorting (ages 3 to 5, about ten minutes): Test household objects in a water bin, predict first. Materials: water bin, assorted small objects. Goal: practice prediction versus observation.
- Rainbow milk explosion (ages 5 to 8, about ten minutes): Dish soap chases food coloring across milk. Materials: milk, food coloring, dish soap, shallow dish. Goal: see surface tension break down visually.
Engineering
- Paper roller coaster (ages 8–13, 45 minutes): Build a marble track from paper tubes and tape. Materials: paper, tape, marble, cardboard base. Goal: apply gravity and momentum concepts hands-on. A build ScienceBuddies documents in detail for home use.
- Toothpick and marshmallow bridge (ages 5–13, 20 minutes): Build a structure that holds weight. Materials: toothpicks, mini marshmallows, small weights. Goal: introduce structural stability.
- Straw rocket launcher (ages 5 to 8, about fifteen minutes): Blow through a straw to launch a paper rocket. Materials: paper, straw, tape. Goal: connect air pressure to motion.
- Aluminum foil boat challenge (ages 5 to 8, about fifteen minutes): Test how many coins a foil boat can hold before sinking. Materials: aluminum foil, coins, water tub. Goal: explore buoyancy and load limits.
- Popsicle stick chain reaction (ages 8 to 13, about twenty minutes): Interlock sticks under tension for a snapping chain reaction. Materials: popsicle sticks. Goal: build fine motor patience alongside physics of stored tension.
- Cardboard maze marble run (ages 5 to 8, about thirty minutes): Design tilting pathways for a marble to travel. Materials: cardboard box, marble, tape. Goal: introduce iterative design and troubleshooting.
Biology and Earth Science
- Plant germination in a bag (ages 3 to 8, minutes to set up, days to observe): Sprout a bean seed against a wet paper towel taped to a window. Materials: bean seeds, paper towel, plastic bag. Goal: observe plant growth stages over time.
- Fruit and vegetable DNA extraction, simplified (ages 8 to 13, about twenty-five minutes): Mash strawberries with dish soap and salt to release visible DNA strands. Materials: strawberries, dish soap, salt, coffee filter, rubbing alcohol. Goal: introduce the idea that living things contain genetic material, an approach museum programs like ScienceBuddies have refined for classroom and home use.
- Edible cell model (ages 5 to 8, about twenty minutes): Use gelatin and candy to map basic cell parts. Materials: gelatin, gummy candy, small bowl. Goal: build a visual model of biological structure.
- Homemade weather station (ages 8 to 13, about thirty minutes plus daily tracking): Measure rainfall and temperature with basic tools. Materials: clear jar, ruler, outdoor thermometer. Goal: practice consistent data collection.
- Sensory nature scavenger hunt (ages 3 to 5, about twenty minutes): Collect leaves, rocks, and seeds and sort by texture or color. Materials: basket, magnifying glass. Goal: build observation vocabulary.
- Mini compost jar (ages 8 to 13, about ten minutes setup, weeks to observe): Layer food scraps and soil in a clear jar. Materials: clear jar, food scraps, soil, water. Goal: observe decomposition as a biological process.
- Erupting mini volcano ecosystem (ages 5 to 8, about twenty minutes): Combine an earth science model with the classic baking-soda reaction to show layered rock and eruption. Materials: clay, baking soda, vinegar, tray. Goal: connect chemistry to geological process.
- Ice excavation dig (ages 3 to 8, minutes setup, hours to melt): Freeze small toys in a block of ice, let kids extract them with tools. Materials: small toys, water, freezer, spoons or warm water. Goal: explore states of matter through play.
- Sun and shadow tracking (ages 5 to 8, about ten minutes at three points in a day): Trace a shadow’s length and position at different times. Materials: chalk, sidewalk, sunny day. Goal: build early astronomy observation skills.
- Homemade lava lamp (ages 3 to 8, about ten minutes): Oil, water, food coloring, and an Alka-Seltzer tablet make bubbling color. Materials: clear bottle, vegetable oil, water, food coloring, Alka-Seltzer. Goal: revisit density and reaction gas in a visually satisfying format.
Setting Up a Low-Mess Home Science Station
You do not need a dedicated lab. You need a tray, a towel, and a short list of supplies that show up in half of everything on the list above.
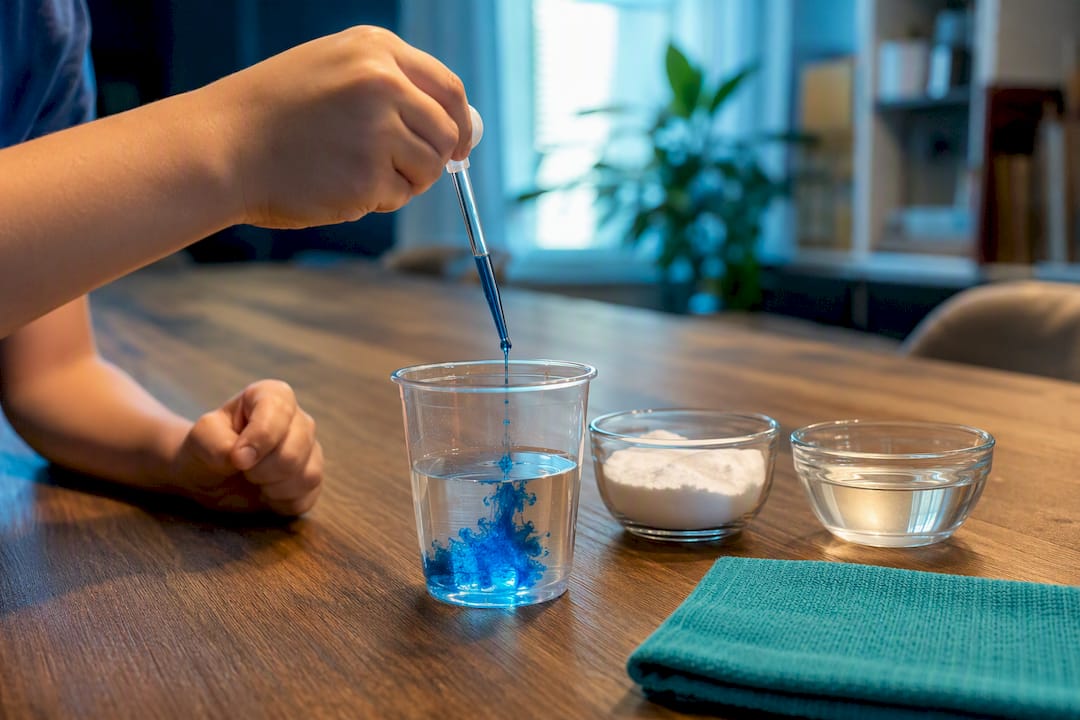
Core pantry staples worth stocking: baking soda, white vinegar, dish soap, food coloring, salt, cornstarch, and vegetable oil. Inexpensive extras that multiply your options: a dropper or two, a small funnel, a handful of clear plastic cups or bottles, a magnifying glass, and a couple of trays or baking sheets. None of this needs to be new. A rinsed yogurt container works as well as a lab beaker.
Containment does more work than any single supply. Running experiments on a cookie sheet, in a plastic bin, or over a washable tablecloth turns a potential disaster into a five-minute wipe-down, and that lower barrier is exactly why caregivers keep coming back to messy activities instead of avoiding them, according to Little Bins for Little Hands. Anything foamy, staining, or genuinely explosive, elephant toothpaste included, belongs outdoors or in the garage.
Safety comes down to a short, repeatable checklist:
- Match supervision to the ingredients. Hydrogen peroxide, heat sources, and anything involving fire need an adult at arm’s length, not across the room.
- No tasting, ever, even when an ingredient looks like food. Baking soda and vinegar are safe to mix but not meant to be eaten mid-experiment.
- Swap ingredients for sensitive households: use gluten-free flour bases for slime if there’s a wheat allergy, or skip nut-based materials entirely when needed.
- Keep sharp tools (scissors, skewers for structures) to the adult’s hands for kids under 8.
For sourcing, look before you buy. Recycled bottles, jars, and cardboard cover most engineering builds, and dollar stores fill in droppers, trays, and food coloring for a few dollars total. Our guide on sodium hydrogen carbonate for kids’ science experiments walks through safe baking soda handling in more depth.
Pro Tip: Keep one “experiment bin” permanently stocked and out of reach of daily use. When curiosity strikes, you’re five minutes from starting instead of thirty.
Turning an Experiment into a Real Learning Moment
The materials matter less than the questions you ask around them. An adult standing back and asking “What do you think will happen?” before the reaction starts does more for learning than perfecting the reaction itself, a point echoed by WeAreTeachers in its guidance for parents running experiments cold.
Use this simple sequence every time:
- Predict. Ask what the child expects before anything happens. Wrong guesses are fine. They’re the whole point.
- Observe. Narrate what’s happening in real time, or let the child narrate it to you.
- Measure, when possible. Even a rough count (“it fizzed for ten seconds”) builds data habits.
- Explain. Ask why they think it happened, without correcting too fast.
- Reflect. What would they change next time?
Changing one variable turns a one-time reaction into a real test. Try more vinegar versus less, warm water versus cold, or a rough surface versus smooth for a rolling ball. Unexpected results aren’t failures. They’re data, and Little Bins for Little Hands treats troubleshooting itself as one of the more valuable lessons a kitchen experiment can teach.
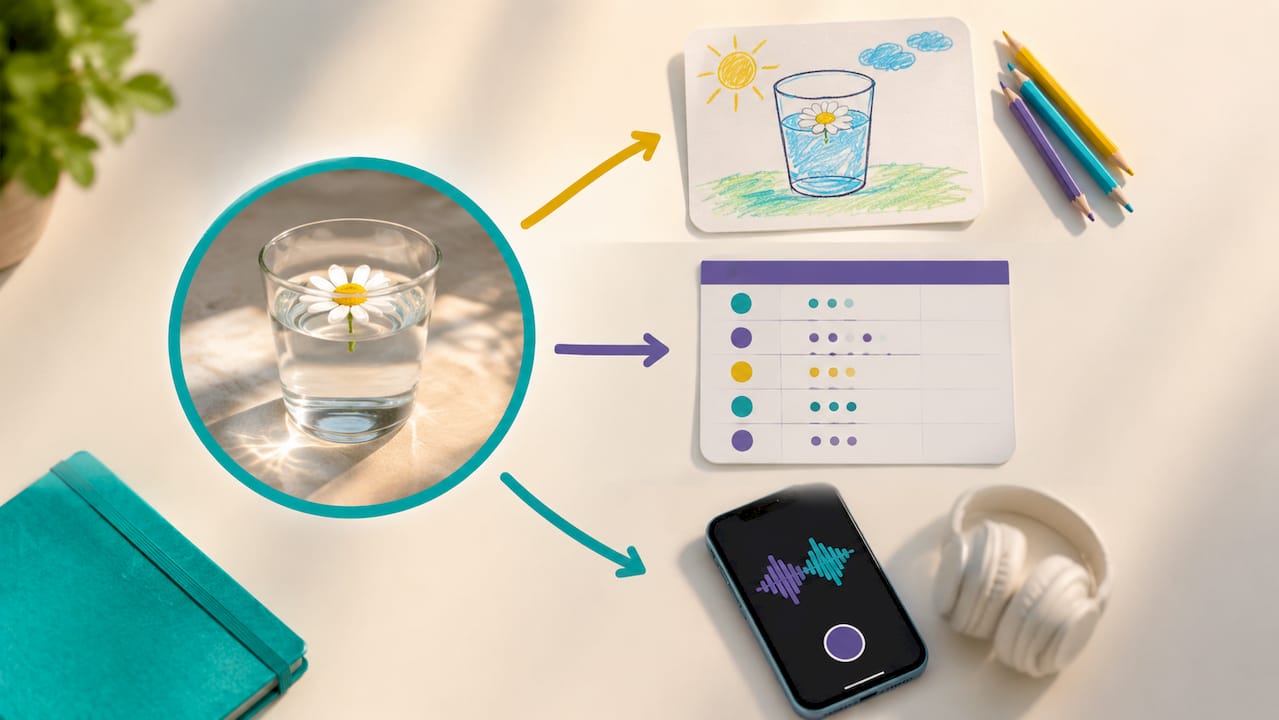
For recording, younger kids can draw what they saw; older kids can jot a one-line table of trial results or narrate a voice memo. Pairing the experiment with a short written prediction or labeled drawing measurably deepens retention, a technique explored in Icon Literary’s guide to book-driven family conversations, which applies just as well to a lab notebook as to a bedtime story.
Matching the Experiment to the Kid, Not the Other Way Around
Attention span, not intelligence, decides whether an experiment lands. A three-year-old wants two or three steps and an immediate result. A twelve-year-old wants a real variable to test and something worth measuring.
- Ages 3–5: Quick, sensory activities with 2–3 steps, heavy adult involvement, five to ten minutes. Sink-or-float sorting, static balloons, fizzy lemonade.
- Ages 5–8: Slightly longer builds with visible cause and effect, ten to twenty minutes, adult nearby but hands-off where safe. Density towers, lava lamps, milk explosions.
- Ages 8–11: Multi-step builds with a design or measurement component, twenty to thirty minutes, adult supervising rather than directing. Egg drops, catapults, roller coasters.
- Ages 11–13: Full variable-control experiments with repeat trials and simple data tables, thirty-plus minutes, adult available for safety only. DNA extraction, weather tracking, chain reactions.
Younger children do best with quick wins in a contained tray; older kids benefit from explicit variable-control challenges and basic tools like rulers and timers, a distinction well documented by ScienceBuddies. You can dial any experiment up or down: simplify a roller coaster to three loops for a younger sibling, or add a stopwatch and distance measurement for an older one testing marble speed.
Pro Tip: A lab coat, a name badge, or a “certified scientist” card costs almost nothing but changes how seriously a kid takes the fifteen minutes in front of them. Role-play isn’t a gimmick here. It’s attention management.

The E³ Method in Action: From Curiosity to Confidence
Most experiment guides stop at the reaction. An E³ Method can guide what happens before and after an experiment: Engage, Encourage, Empower. Engage can start the moment a child puts on a lab coat and takes on the identity of a scientist, not just a kid following steps. Encourage happens through scaffolded prompts, an adult asking guiding questions instead of handing over answers, so a child who struggles with reading directions doesn’t stall out. Empower can close the loop with a certificate, a reflection page, or a small badge that turns “I did an experiment” into “I am someone who does science.”
Picture a child running a solar energy kit with a mirror disk: they suit up, predict what the mirror will do to sunlight, run the test, then write one sentence about what surprised them. That last step, pairing the experiment with a short piece of writing, is where confidence actually sticks.
Why Identity-Driven Science Sticks
I’ve come to think the biggest thing conventional science activities get wrong isn’t the content. It’s the framing. Handing a child a worksheet says “follow instructions.” Handing a child a lab coat and a badge says “you belong in this role,” and that shift changes how kids handle the inevitable moment when an experiment doesn’t work the first time.
This matters most for kids who’ve had a rough time in traditional classrooms, including many with dyslexia or dysgraphia, where the identity of “struggling student” can overshadow real curiosity. Try one experiment from this list today and watch what happens when the goal shifts from getting it right to finding out what happens.
— Tita
Ready-Made Kits for When You Want the Prep Done For You
Everything in this guide works with what’s already in your kitchen, and that’s genuinely worth doing. But some weeks you want the materials measured, the role-play built in, and the reflection prompts already written, without a supply run first. That’s the gap Team Genius Squad’s Experiment Kits are built to close.
Some kits are designed for kids ages 5 to 13 and pair real materials with a lab coat, a badge, and a guided reflection page, so the E³ Method shows up in the box, not just on paper. Reach for a kit when you want a guaranteed low-mess setup, a built-in confidence moment, or a gift that turns a rainy afternoon into a full scientist experience without you having to plan it. Reach for DIY when you’ve got the ingredients on hand and twenty free minutes. Browse the experiment kits collection to find one that matches your child’s age and current curiosity, whether that’s chemistry, engineering, or the solar kit mentioned above.
Sources
- Science Experiments for Kids - Little Bins for Little Hands
- STEM activities - ScienceBuddies
- 70+ Easy Science Experiments Using Materials You Already Have - WeAreTeachers


Leave a comment
This site is protected by hCaptcha and the hCaptcha Privacy Policy and Terms of Service apply.