Build a potato clock: fun step-by-step STEAM project for kids
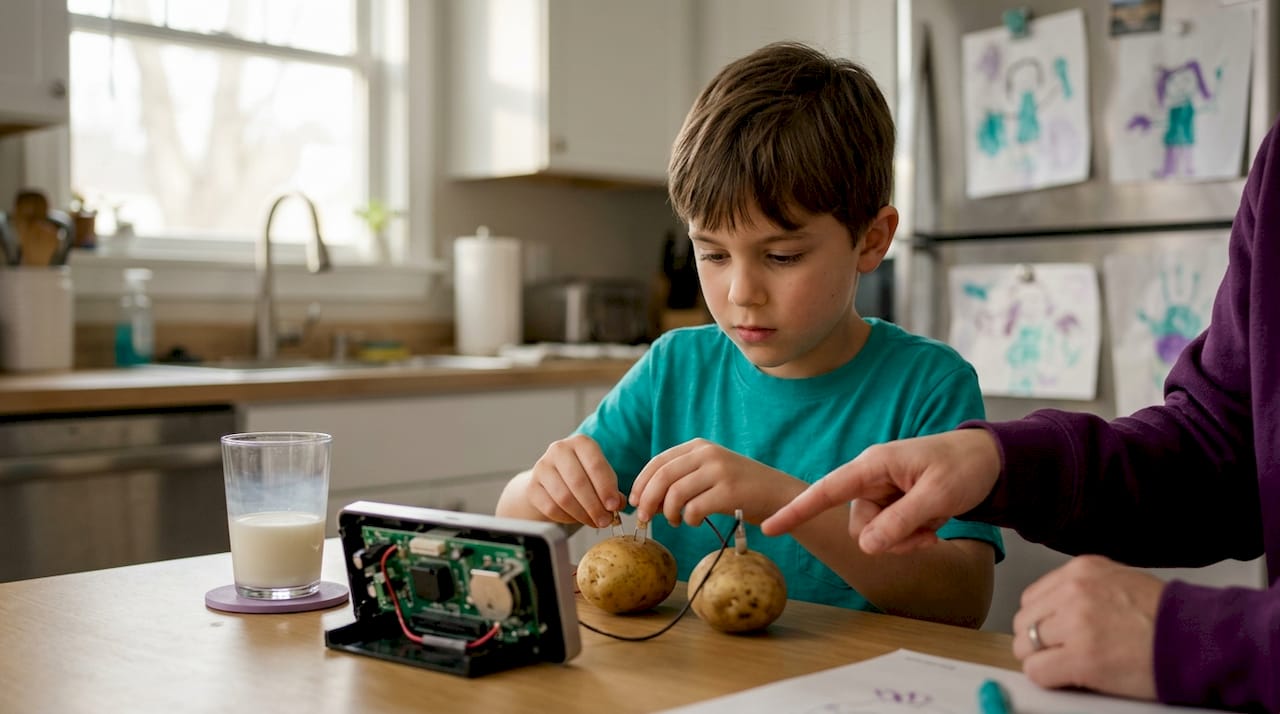
Picture this: your child holds up a potato and asks, “Can this really power a clock?” That one question is the spark behind one of the most memorable hands-on STEAM projects you can do together at home. The potato clock experiment blends real electrochemistry with creative problem solving, and it is surprisingly accessible for children ages 5 to 13, including those who learn differently. This guide walks you through the science, the materials, the building steps, and the troubleshooting tricks so your child can experience the deep confidence that comes from making something work with their own hands.
Table of Contents
- What is a potato clock and why does it work?
- What you need: Materials and setup tips
- Step-by-step: Building and testing your potato clock
- Troubleshooting and creative challenges
- What most science guides miss: Empowering every learner through iteration
- More hands-on STEAM learning awaits
- Frequently asked questions
Key Takeaways
| Point | Details |
|---|---|
| Accessible science | A potato clock is a safe, child-friendly way to explore electricity with household items. |
| Hands-on learning | Building and adjusting the clock helps kids practice observation and iteration. |
| Neurodivergent support | Step-by-step adjustments and clear goals make this project especially confidence-building. |
| Troubleshooting skills | Mistakes are part of the experiment—adding potatoes or checking connections can solve most problems. |
| Explore more | Once you master a potato clock, try other fruits or STEM kits to keep learning fun. |
What is a potato clock and why does it work?
A potato clock is exactly what it sounds like: a digital clock powered by the chemical energy stored inside one or more potatoes. It sounds almost magical, but the science is grounded and real. As BBC Bitesize explains, a potato clock is essentially an electrochemical battery, where two different metals placed inside the potato’s acidic juices act as electrodes and produce electrical energy through a process called a redox reaction.
The two metals most commonly used are zinc and copper. Zinc acts as the anode, meaning it releases electrons when it reacts with the acids inside the potato. Copper acts as the cathode, which has a relative shortage of electrons. When you connect the two metals with a wire and a clock, electrons travel from the zinc through the wire to the copper, and that flow of electrons is electric current. Think of it like a relay race: the zinc passes the baton (electrons) to the copper, and the clock is waiting at the finish line to receive the energy.
The potato itself is not the fuel. It is the electrolyte, which is a substance that allows charged particles called ions to move between the two metal electrodes inside the potato. Without that ion movement, the circuit would not be complete, and no electricity would flow. This is why other acidic fruits and vegetables can work too, though potatoes are ideal because they are inexpensive, easy to handle, and produce a reliably steady reaction.
Building this project helps children practice real STEAM skills, including:
- Observation: Watching what happens when they connect each wire
- Hypothesis building: Predicting what will change when they add another potato
- Iteration: Adjusting connections and testing again until the clock runs
- Problem solving: Figuring out why something is not working and trying a fix
- Data recording: Writing down voltage readings and comparing results
You can also explore the lemon battery experiment as a related project that uses the same electrochemical principles with a different fruit.
| Component | Role in the circuit | Fun fact |
|---|---|---|
| Zinc electrode (anode) | Releases electrons by reacting with potato acids | Galvanized nails are coated in zinc and work great |
| Copper electrode (cathode) | Receives electrons to complete the circuit | Copper is one of the best conductors of electricity |
| Potato (electrolyte) | Allows ions to move between the two metals | The potato’s phosphoric acid drives the reaction |
| Connecting wires | Carry electrons from one cell to the next | Alligator clip wires make connections easy for kids |
| Digital clock module | Converts electrical energy into a visible display | Most LCD clocks need only 1 to 2 volts to run |
What you need: Materials and setup tips
Equipped with a basic understanding, let’s gather your materials and set up for success. The good news is that most of what you need is either already in your kitchen or available at a hardware store for just a few dollars.
| Material | Required or optional | Notes |
|---|---|---|
| 2 to 4 medium potatoes | Required | Fresh, firm potatoes work best |
| Zinc electrodes (galvanized nails) | Required | Available at any hardware store |
| Copper electrodes (copper wire or strip) | Required | Use clean copper, not pennies |
| Alligator clip wires | Required | Pre-made sets reduce fine motor challenges |
| Digital clock module | Required | Low-voltage LCD clocks are ideal |
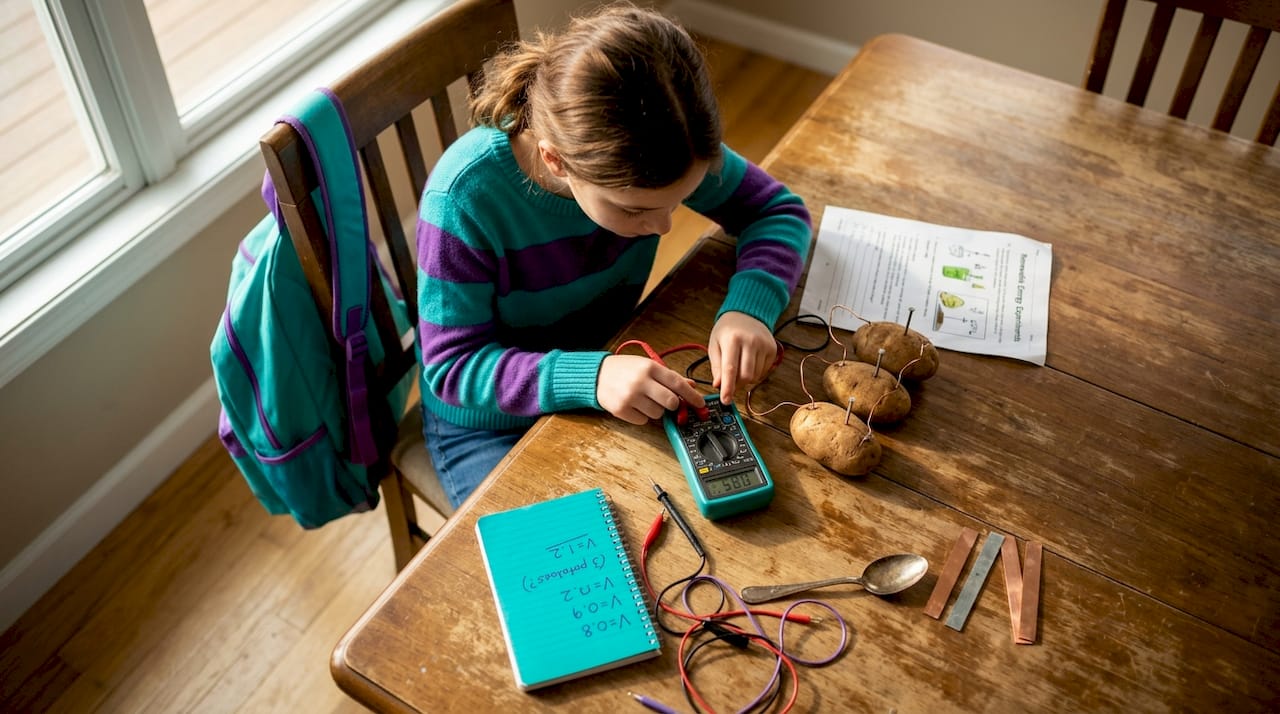
| Voltmeter or multimeter | Optional but recommended | Helps kids see real voltage readings |
| Cutting board and knife (adult use) | Required | For cutting potatoes if needed |
| Notebook and pencil | Optional | For recording observations |
One important note about pennies: modern pennies are zinc with only a thin copper coating, which means they may not deliver consistent results. Using clean copper wire or copper strip gives your child a much more reliable experiment and a much more satisfying outcome.
Here is another key fact that surprises many parents: a single potato cell typically produces only around 0.5 to 0.8 volts, which is not enough to power most digital clocks. You will need to connect two or more potato cells in a series circuit to reach the voltage required. This is actually a wonderful teaching moment because it shows children that real engineers often have to combine multiple energy sources to power a device.
Setting up your workspace:
- Clear a flat, dry table and lay out all materials so your child can see everything at once.
- Cut each potato in half (adult step) to create stable, flat surfaces for inserting electrodes.
- Inspect each electrode for rust or dirt and clean with a damp cloth if needed.
- Lay out alligator clip wires in order so the sequence is visually clear before building begins.
- Place the clock module where your child can easily see the display during testing.
- Keep a notebook nearby so your child can draw the setup and write down what they observe.
Pro Tip: For younger children or those with fine motor challenges, pre-attach the alligator clips to the electrodes before the activity begins. This lets your child focus on the exciting part, which is connecting the cells and watching the clock come to life, rather than struggling with small clips.
For a fuller exploration of electricity-based learning, the electricity lab bundle offers a curated set of experiments that build on these same principles in a structured, confidence-building sequence.
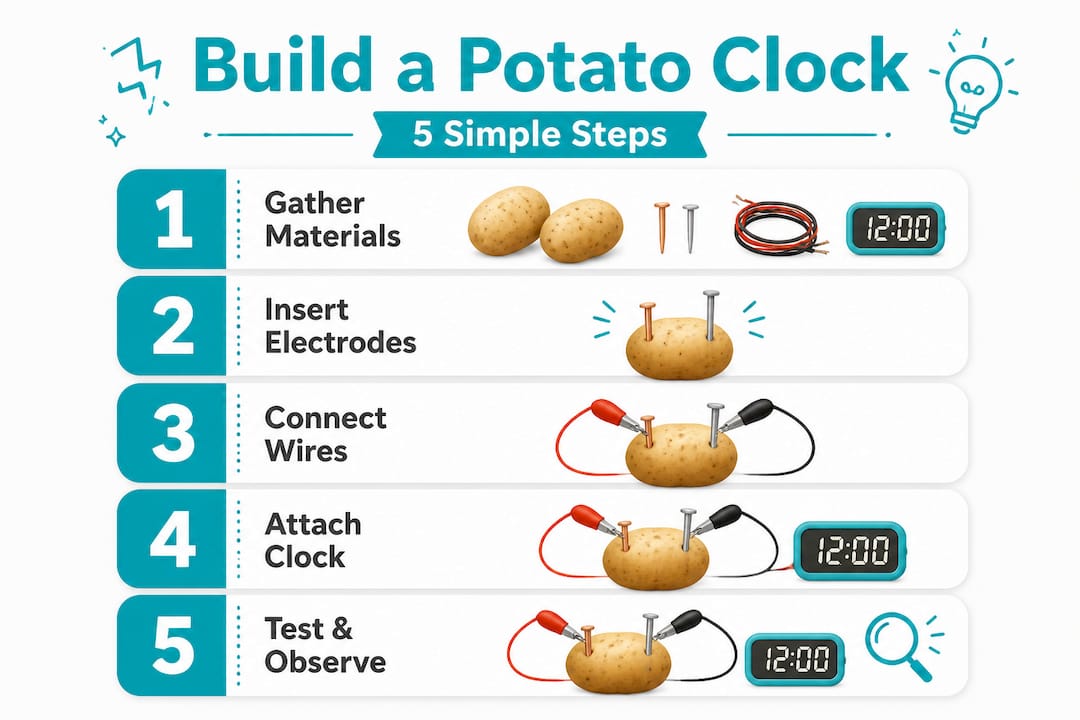
Step-by-step: Building and testing your potato clock
With everything ready, let’s get building! Follow these steps and discover how you and your child can power a clock and a love of STEAM.
- Insert the zinc electrode (galvanized nail) into one end of the first potato half, pushing it in about halfway. Make sure it is secure but not touching the copper electrode.
- Insert the copper electrode into the other end of the same potato half, keeping it well separated from the zinc. The two metals must not touch inside the potato or the circuit will short out.
- Repeat for each additional potato cell. Two to four cells connected in series will give you the best results.
- Connect the cells in series by attaching an alligator clip wire from the copper electrode of the first potato to the zinc electrode of the second potato. Continue this pattern for each additional cell.
- Attach the clock module by connecting the positive terminal of the clock to the copper electrode of the last potato in the series, and the negative terminal to the zinc electrode of the first potato.
- Observe the display. If the clock lights up, celebrate that win loudly! If it does not, move to step 7.
- Troubleshoot and iterate. Check that no electrodes are touching inside the potato, confirm all clips are making solid contact, and add another potato cell in series if the voltage is still too low.
The kid-friendly iterative approach recommended for ages 5 to 13 is to frame each adjustment as its own mini experiment. Ask your child, “What do you think will happen if we add one more potato?” Then test it, observe it, and talk about what changed. This is exactly how real scientists work.
Each potato cell produces roughly 0.8 volts on average, so two cells give you approximately 1.6 volts, which is typically enough to run a basic LCD clock. Ensuring different electrode metals do not touch inside the potato, making secure electrical contacts, and adding more cells in series are the four mechanics that matter most for success.
Pro Tip: If the clock still will not run after adding a third potato, check your alligator clip connections first. A loose clip is the most common reason a circuit fails, and fixing it gives your child an immediate, satisfying result.
You can find a complete step-by-step potato clock kit that includes all the materials and guided instructions your child needs to build with confidence from the very first try.
Troubleshooting and creative challenges
Even the best scientists troubleshoot. Here’s how to solve common issues and keep the learning going.
Common reasons a potato clock might not run:
- Electrodes are touching inside the potato, causing a short circuit
- Alligator clips are not making full metal-to-metal contact
- The potato cells are not connected in the correct series order
- The potato is old or dried out and no longer producing enough acidic juice
- The clock module requires more voltage than your current setup provides
Voltage drops over time in a potato battery because the electrochemical reaction is not designed to be as stable as a sealed commercial battery. If your clock slows or stops after a while, simply add another potato cell in series and check that all connections are tight. Per-potato voltage runs around 0.8 volts, so adding cells is always your first and best solution.
Once the clock is running, the real fun begins. Here are some creative challenges to extend the learning:
- Power a small LED light instead of a clock and compare how many potato cells it takes
- Swap out the potato for a lemon, apple, or orange and compare voltage readings with a voltmeter
- Track voltage drop over 30 minutes by recording readings every five minutes and graphing the results
- Try boiled versus raw potato and observe how cooking changes the electrolyte’s effectiveness
- Add more zinc and copper surface area by using larger nails and wider copper strips to see if output increases
For neurodivergent learners, reducing executive load is a powerful strategy. Pre-assemble the safe parts, present one variable at a time, and let your child make a single change per round, such as adding one more potato cell or swapping which terminal connects where. Recording voltage or light results after each change gives children concrete, visible proof that their actions produced a real outcome. That proof is confidence in its most tangible form.
For more inclusive STEM resources designed with neurodivergent learners in mind, or to explore a related hands-on activity, try a lemon battery puzzle that uses the same electrochemical magic with a citrus twist.
What most science guides miss: Empowering every learner through iteration
Now, let’s step back and look at why this project matters beyond just lighting up a clock.
Most science guides for kids focus almost entirely on getting the right result. They walk you through the steps, tell you what should happen, and then move on. What they rarely address is what happens when the clock does not light up on the first try, and more importantly, what that moment means for a child’s relationship with learning.
Here at Team Genius Squad, we believe that the moment of “it’s not working yet” is actually the most valuable part of the entire experiment. When a child checks their connections, adds another potato, and then watches the clock display flicker to life, they are not just learning electrochemistry. They are learning that persistence produces results. That is a lesson that travels far beyond any science fair.
This matters especially for children who have struggled in traditional learning environments. A child with dyslexia or dysgraphia may have heard the message, in subtle and not-so-subtle ways, that they are not the kind of person who succeeds at academic tasks. A hands-on project like a potato clock rewrites that story. There is no reading comprehension test here, no perfectly formed letters required. There is only a child, some potatoes, and the electric thrill of making something work.
The key is fostering science confidence through small, celebrated wins rather than waiting for the grand finale. Every secure connection is a win. Every voltage reading is a win. Every “what if I try this?” is a win. Parents who frame the experiment this way will find that their child walks away not just knowing how a potato battery works, but genuinely believing they are the kind of person who can figure things out.
The best outcome of this project is not a clock that runs perfectly. It is a child who says, “I want to try it with a lemon next.”
More hands-on STEAM learning awaits
The potato clock is just the beginning of what your young innovator can discover. Every experiment your child completes builds a new layer of confidence, curiosity, and creative thinking that carries into every area of their life.

Team Genius Squad’s hands-on, screen-free kits are designed to keep that momentum going, with every material, guide, and role-play tool your child needs to step fully into the identity of a scientist and innovator. The electricity lab bundle is a natural next step after the potato clock, offering a curated series of electricity experiments that build on each other beautifully. For families just getting started, the starter bundle kit includes a lab coat and guided experiments that make every child feel like the scientist they truly are. And for a spark of electrifying fun, the electric science kit delivers hands-on discovery that children ask to repeat again and again.
Frequently asked questions
Why does a potato clock need more than one potato?
Each potato cell produces only about 0.8 volts, which is not enough on its own to power a digital clock, so connecting two or more cells in series raises the total voltage to a usable level.
Is it safe for children to make a potato clock?
Yes, this is a safe experiment for ages 5 to 13 when an adult prepares the wires and electrodes in advance and supervises the connection steps.
What metals work best for the electrodes in a potato clock?
Clean copper and zinc work best because they create the greatest electrochemical difference; modern pennies are zinc-coated and may not deliver reliable results, so copper wire or strip is the better choice.
If my clock won’t run, what should I try first?
Check that the electrodes are not touching inside the potato, confirm every alligator clip is making solid contact, and add more cells in series if the voltage is still too low to run the display.
Can you use other vegetables or fruits for this project?
Absolutely. Lemons, apples, and other acidic produce work in similar experiments because they also contain acids that act as electrolytes and support the same electrochemical reaction between the two metal electrodes.


Leave a comment
This site is protected by hCaptcha and the hCaptcha Privacy Policy and Terms of Service apply.